> For the complete documentation index, see [llms.txt](https://docs.greytrix.com/llms.txt). Markdown versions of documentation pages are available by appending `.md` to page URLs; this page is available as [Markdown](https://docs.greytrix.com/gumu-salesforce-integration/sage-intacct-1/user-guide/promotion/promote-invoice.md).
# Promote Invoice
Below are the steps to verify the Invoice Promote functionality.
Create “**Invoice**” in Creatio and add **Products** in an Invoice. Click on the “**Promote to Sage**” button.
Once a record is promoted into the Sage Intacct system, a unique ID “**ERP Invoice Number**” will be updated in the Creatio system to ensure a linked record in both systems. The unique ID will be used to update the record in both systems during subsequent updates.
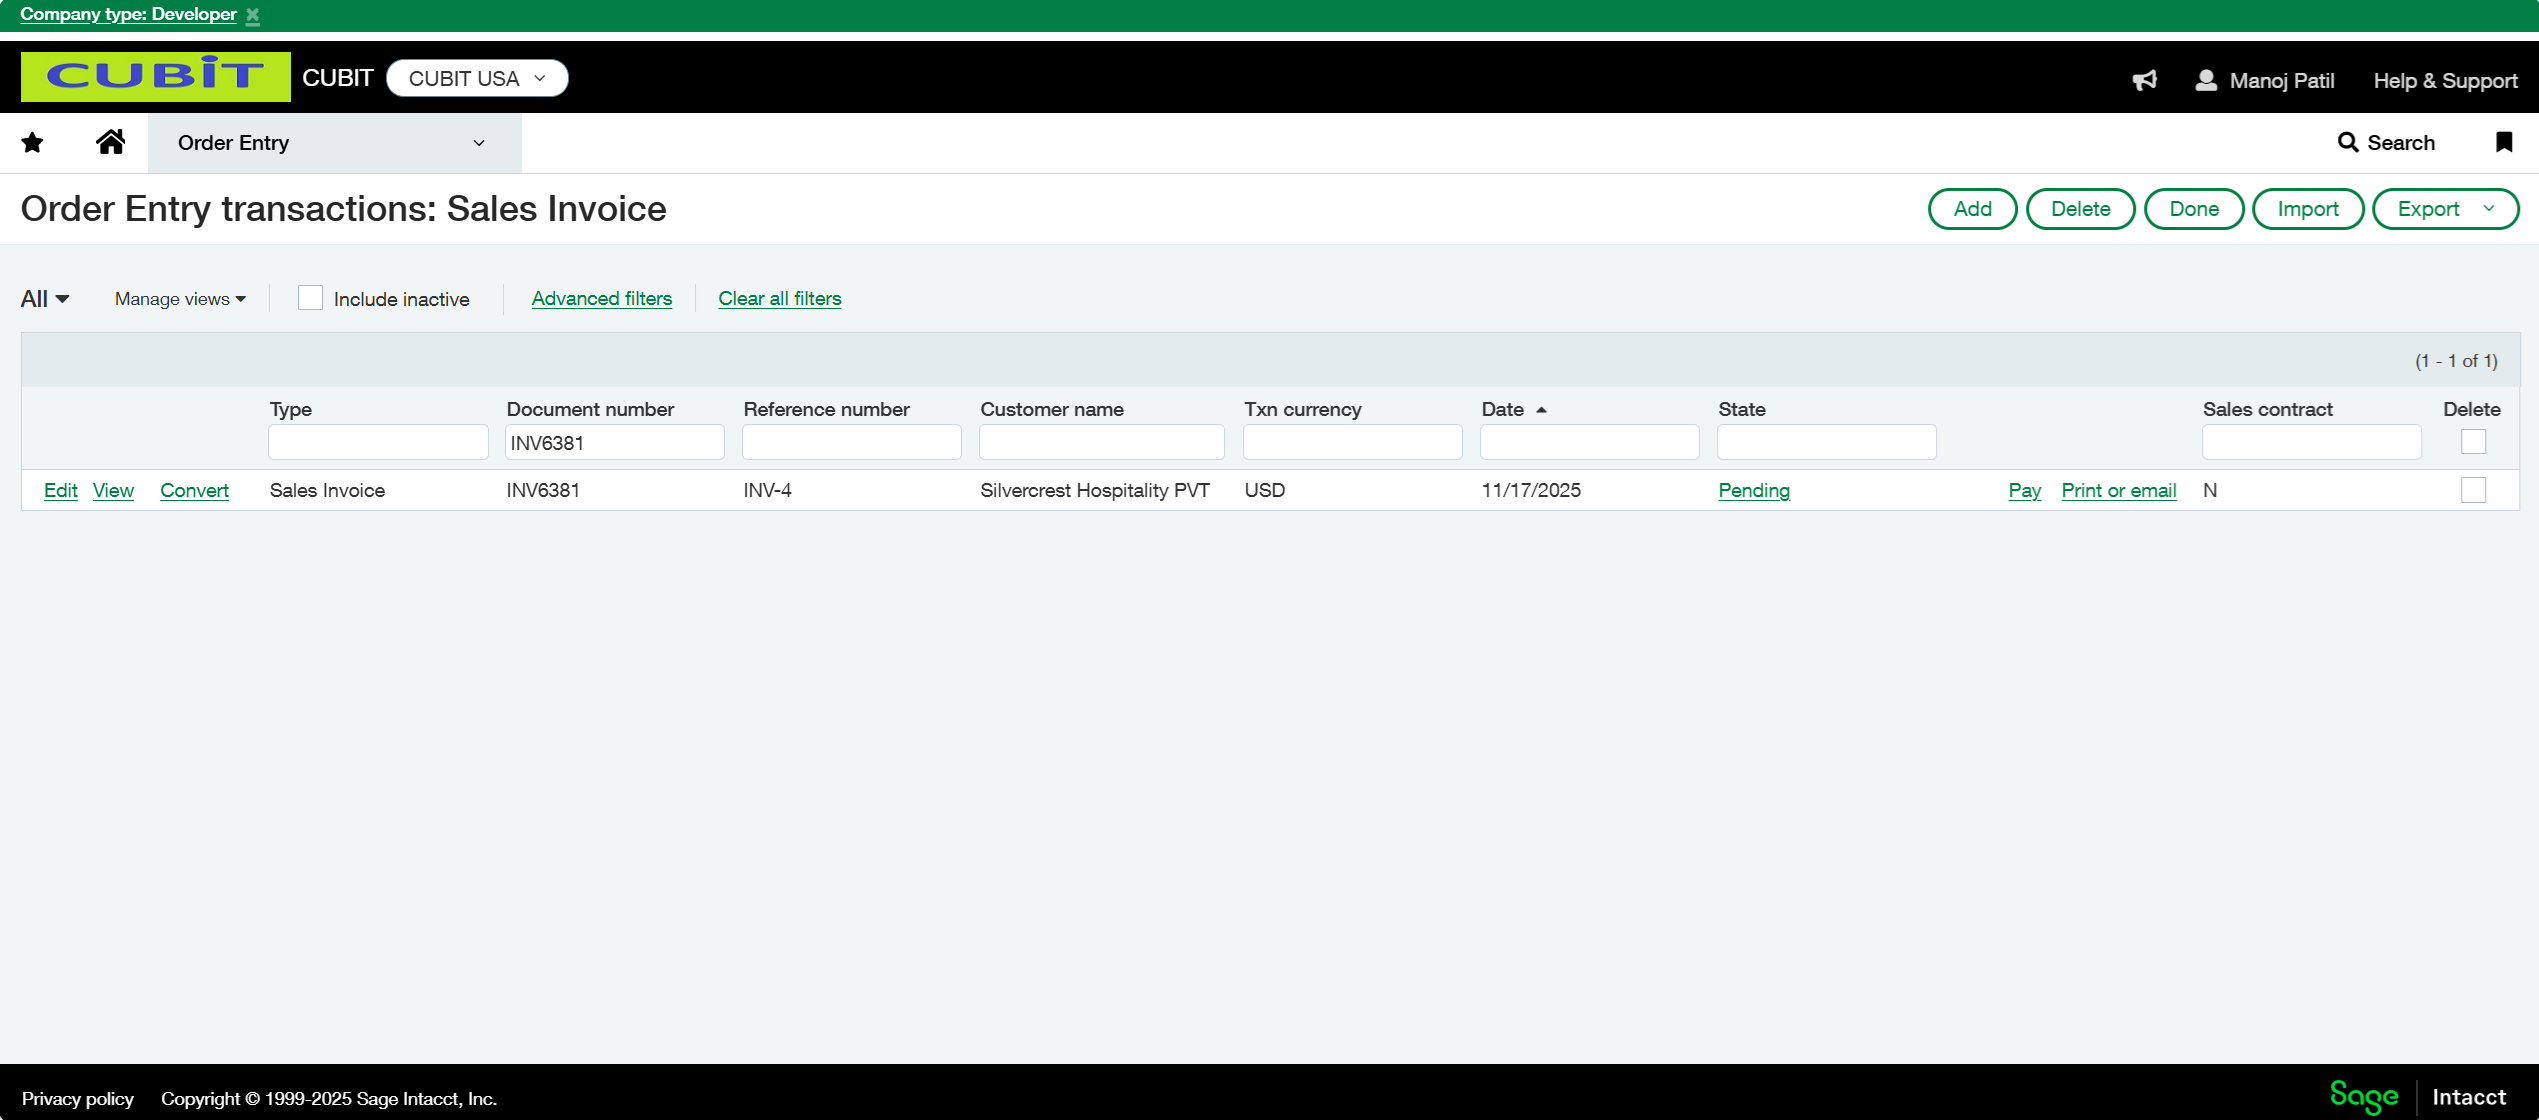
In the above example, contact “**ERP Invoice Number**” will be set as “**INV6381**” and will be visible in Sage Intacct ERP.
In Sage Intacct ERP, select “**Sales Invoice**” option by navigating from Applications | Order Entry | Sales Invoice as shown below.
Put “**ERP Invoice Number**” in the **Document Number** field as shown below and click on the Enter button of keyboard. On click of enter button, Invoice Promoted from Creatio will be visible here.
Click on the **View** hyperlink to review the Sales Invoice details.