> For the complete documentation index, see [llms.txt](https://docs.greytrix.com/llms.txt). Markdown versions of documentation pages are available by appending `.md` to page URLs; this page is available as [Markdown](https://docs.greytrix.com/gumu-salesforce-integration/sage-intacct-1/installation-guide/gumu-tm-subscription-and-configuration.md).

# GUMU™ Subscription and Configuration

#### **Sign up with a BPortaly user account:**

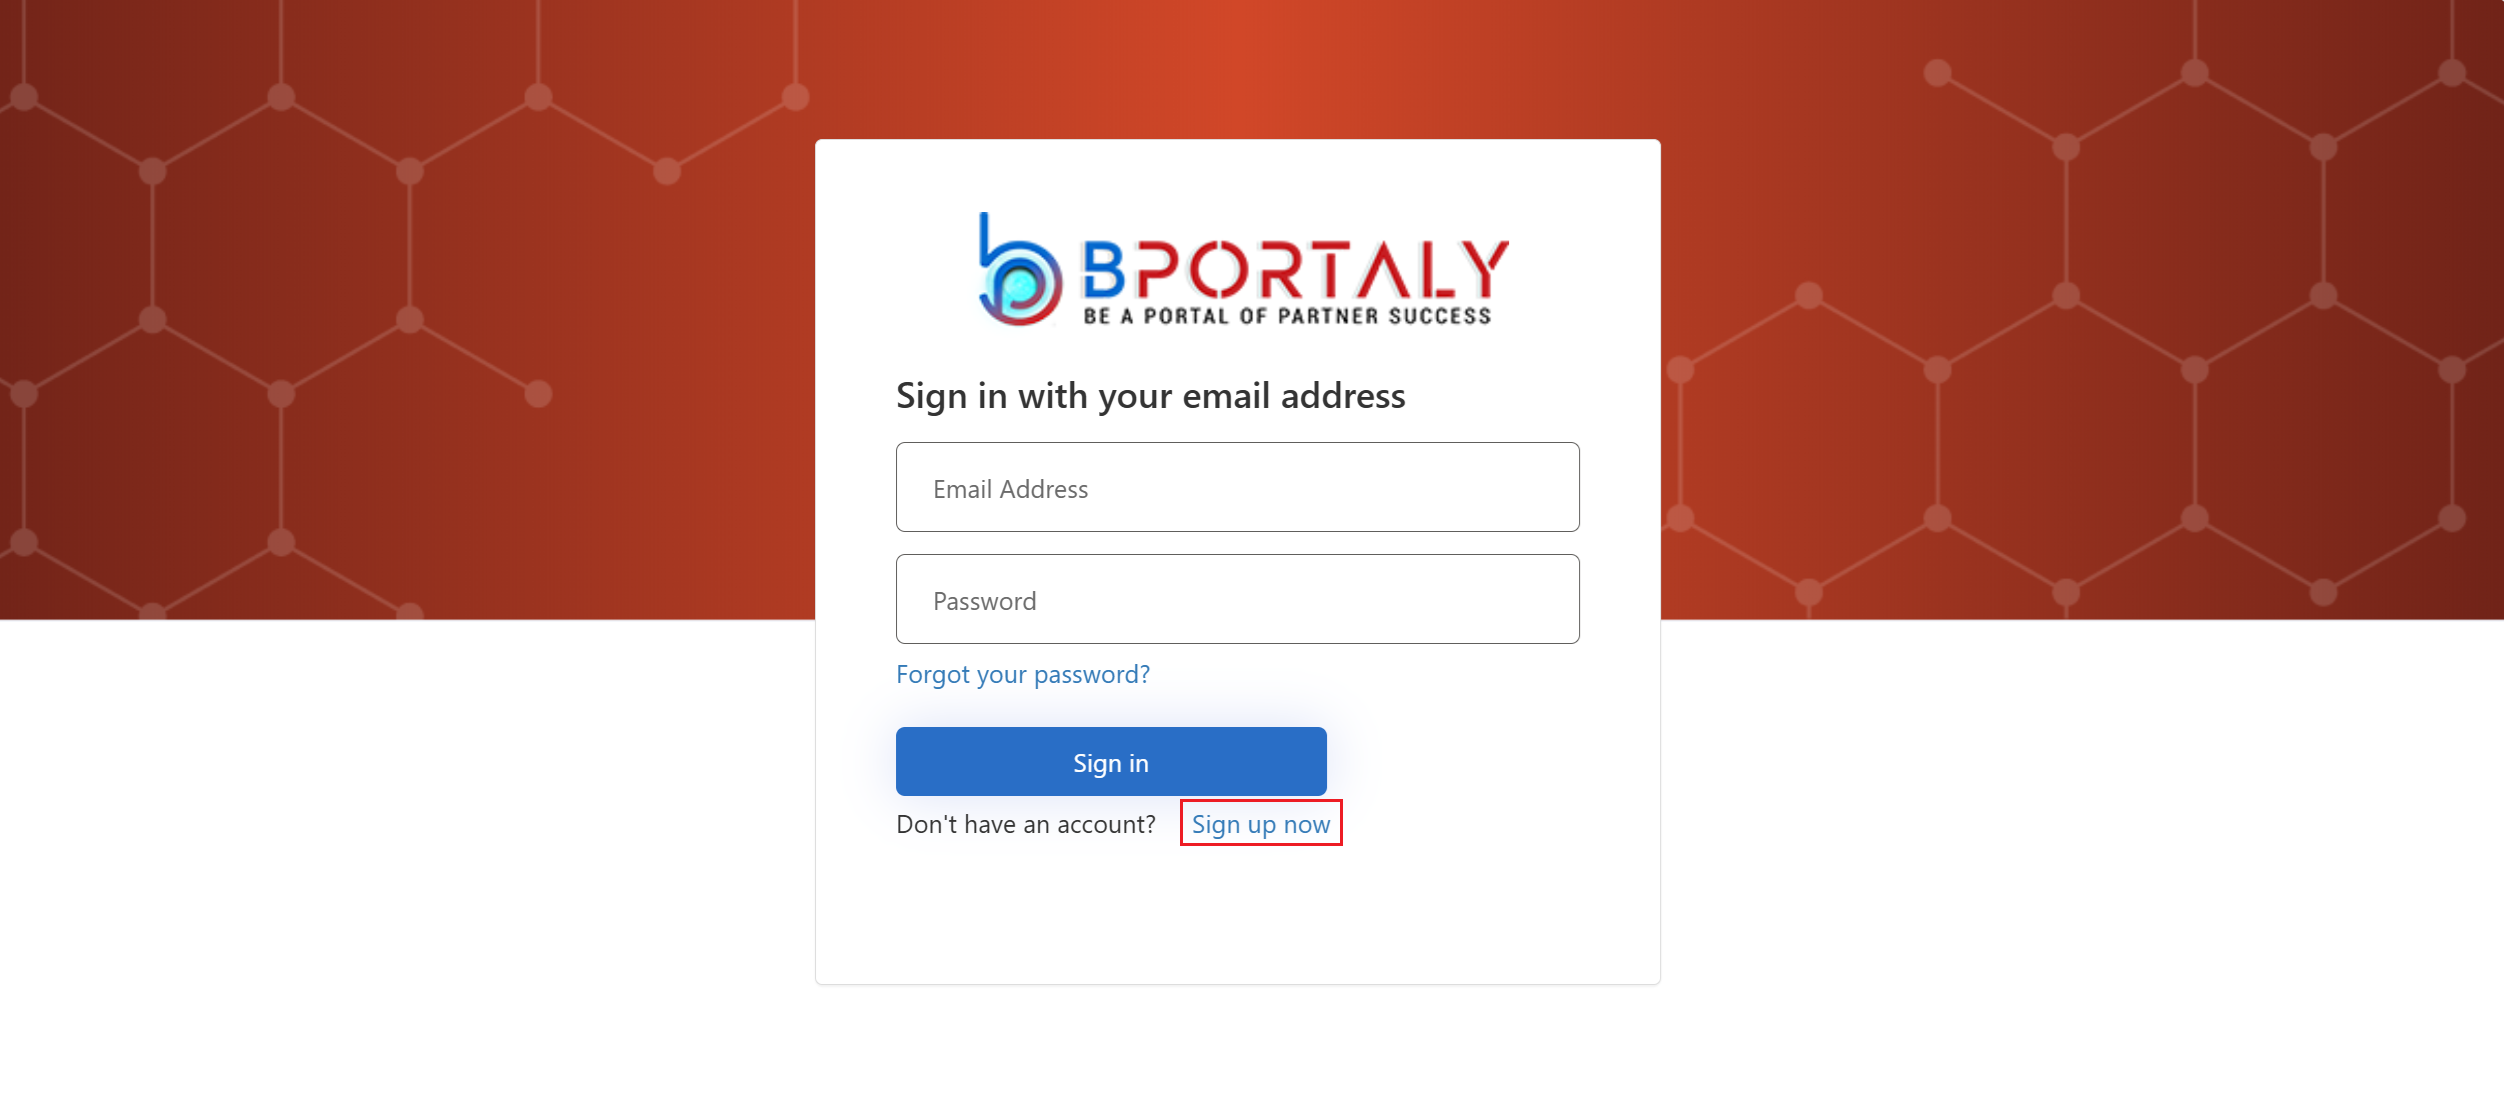
1. Access the respective BPortaly portal below, then click ‘**Sign up now**.’\
   \
   Live URL: <https://apps.bportaly.com/>\
   \
   Staging URL: <https://staging.bportaly.com:8091/>

<figure><img src="https://794987320-files.gitbook.io/~/files/v0/b/gitbook-x-prod.appspot.com/o/spaces%2F-MCRVg-TYx3gVa2Tqtf_%2Fuploads%2FoxwVrSSywuvQS3KYlxiF%2Fimage.png?alt=media&amp;token=5990b78b-4285-4629-9f5f-0daadc6a90b8" alt=""><figcaption></figcaption></figure>

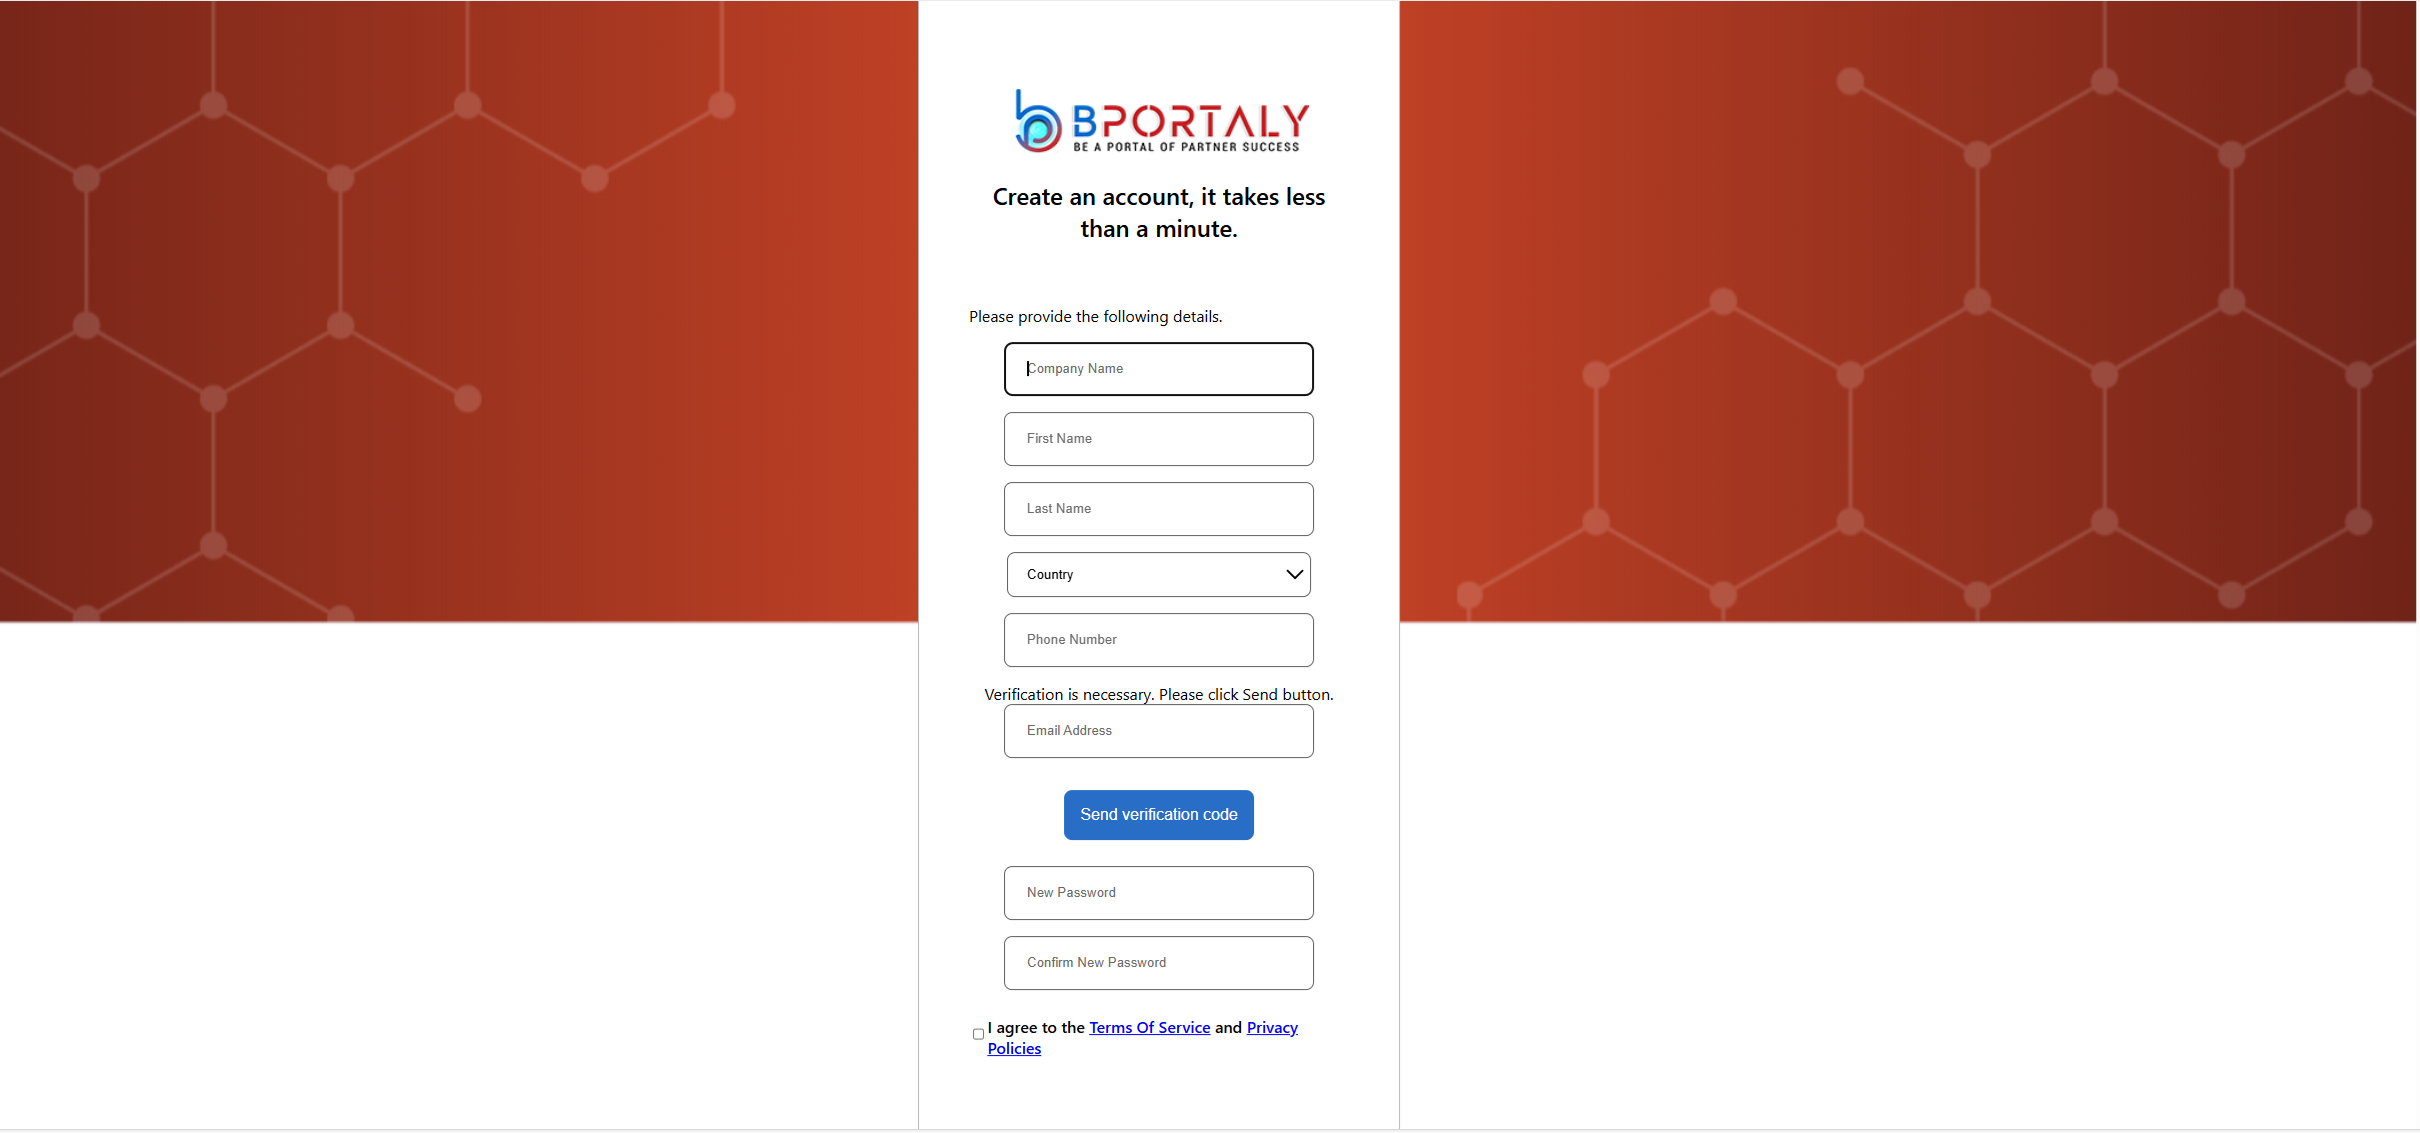
2. Enter your required details like Company Name, First Name, Last Name, etc., and verify the user by entering the verification code sent to your registered email address

<figure><img src="https://794987320-files.gitbook.io/~/files/v0/b/gitbook-x-prod.appspot.com/o/spaces%2F-MCRVg-TYx3gVa2Tqtf_%2Fuploads%2FkU8aPtuqa8z23dvlKkrG%2Fimage.png?alt=media&amp;token=01b08563-e302-4e90-a21a-69ca5506496b" alt=""><figcaption></figcaption></figure>

While signing up as shown above, if you face any issues, please do not hesitate to contact us at <creatio@greytrix.com>

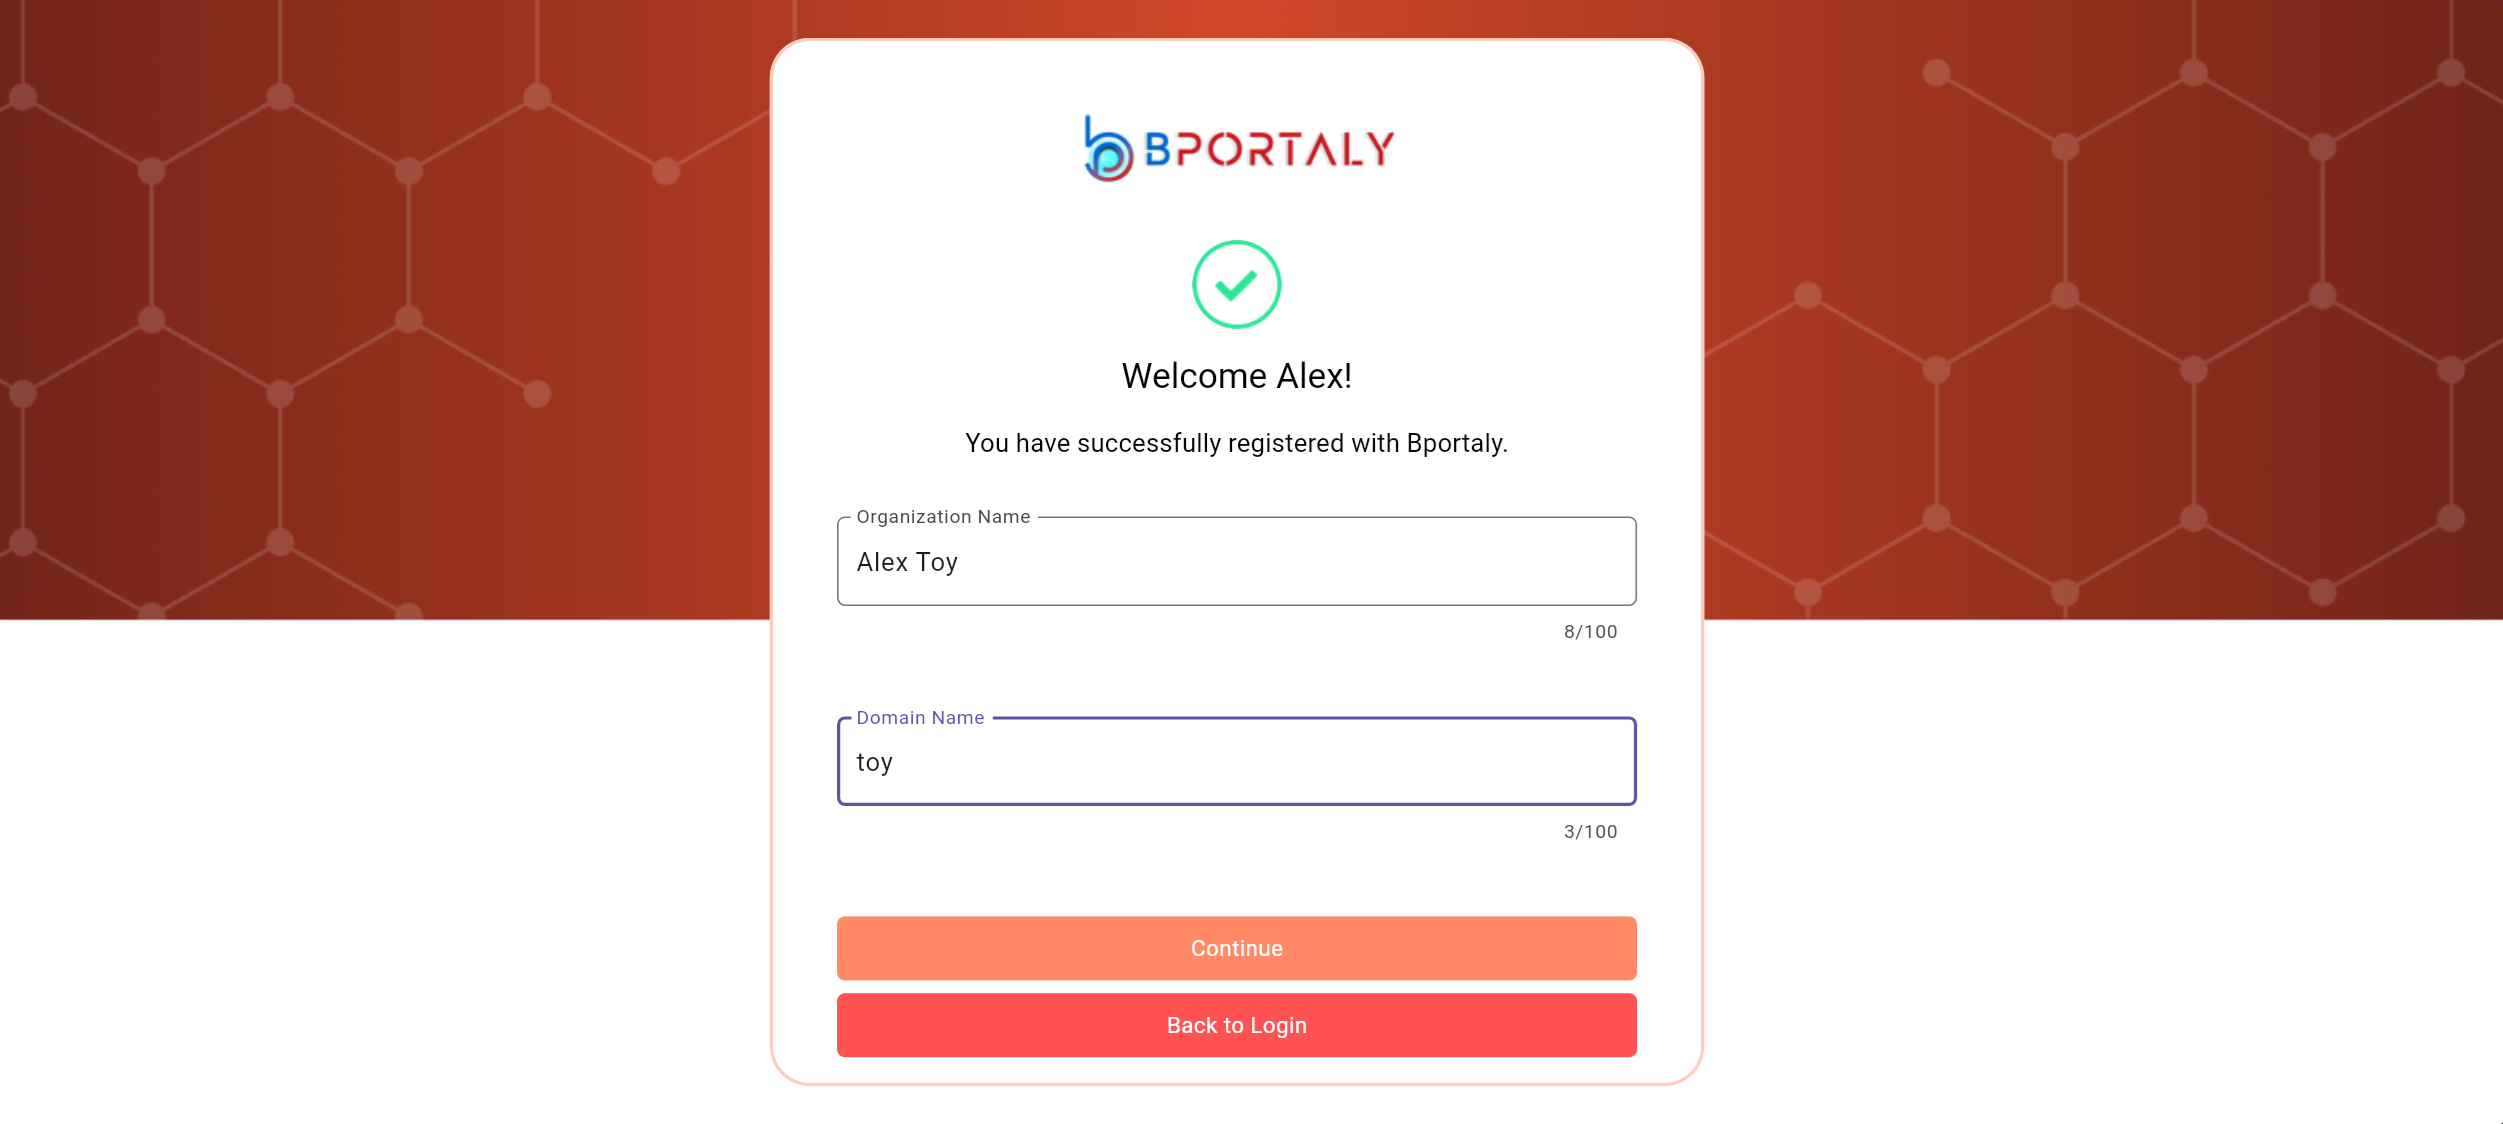
3. Now, enter the organization name and your domain, then click on continue. The user will be created and logged in successfully.

<figure><img src="https://794987320-files.gitbook.io/~/files/v0/b/gitbook-x-prod.appspot.com/o/spaces%2F-MCRVg-TYx3gVa2Tqtf_%2Fuploads%2FRS5U4Rj6KfyV0rEb8P1R%2Fimage.png?alt=media&amp;token=5ecfe5e6-f356-4324-bfb6-3e7e6f863924" alt=""><figcaption></figcaption></figure>

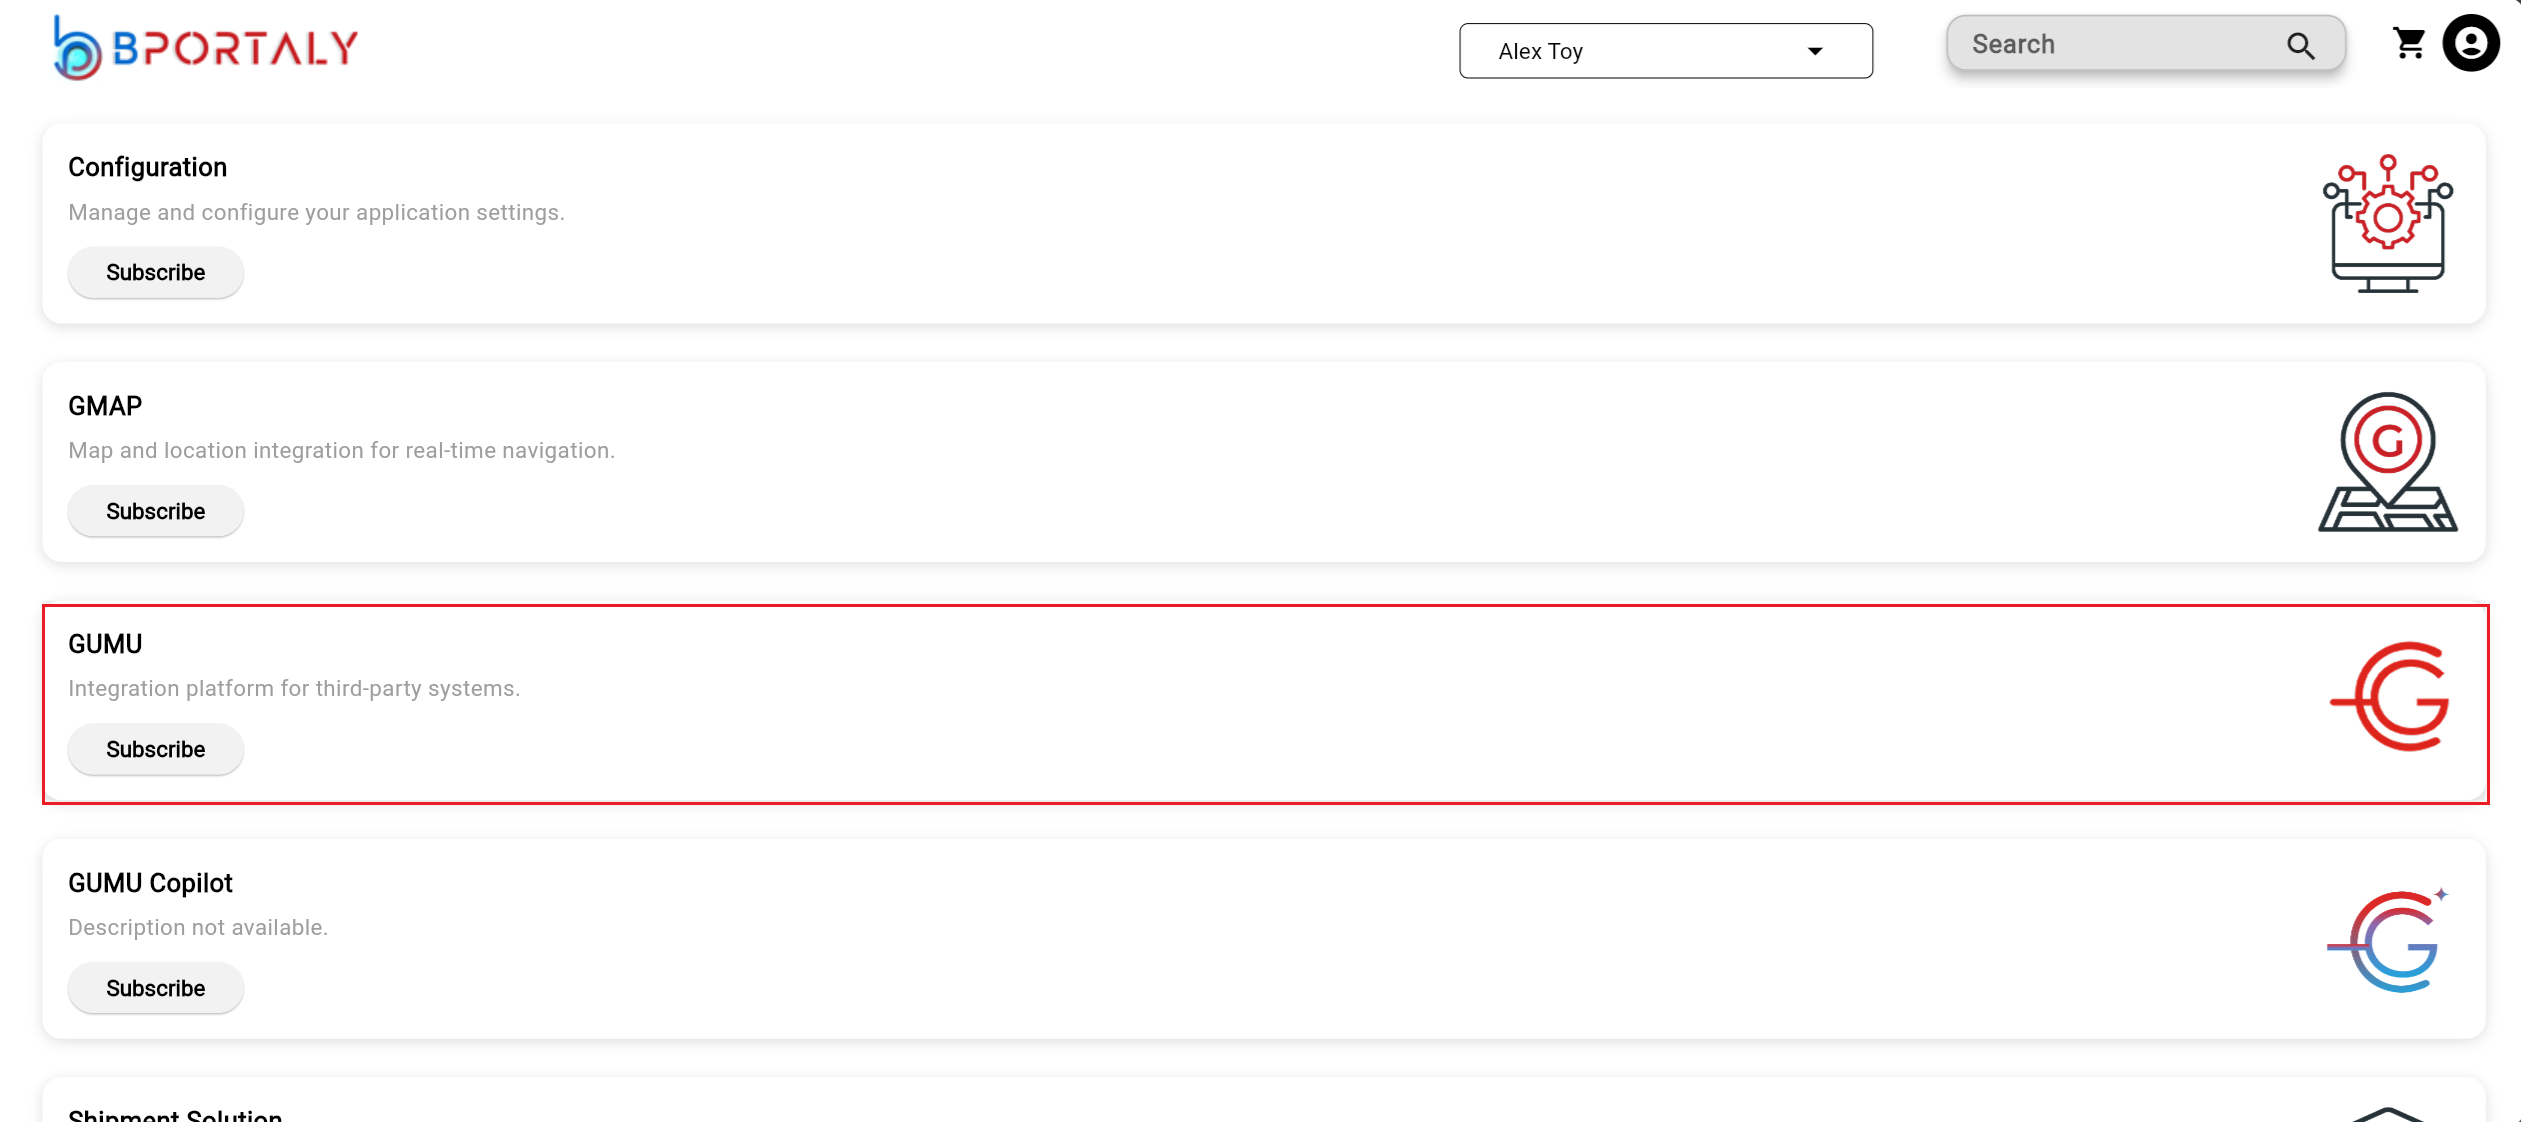
4. On the portal homepage, navigate through the list of applications and subscribe to the application named GUMU.

<figure><img src="https://794987320-files.gitbook.io/~/files/v0/b/gitbook-x-prod.appspot.com/o/spaces%2F-MCRVg-TYx3gVa2Tqtf_%2Fuploads%2FqNF6s9mBvezyM4nwZtsf%2Fimage.png?alt=media&amp;token=ee2e0697-49d4-408a-be2d-9b72a0169720" alt=""><figcaption></figcaption></figure>

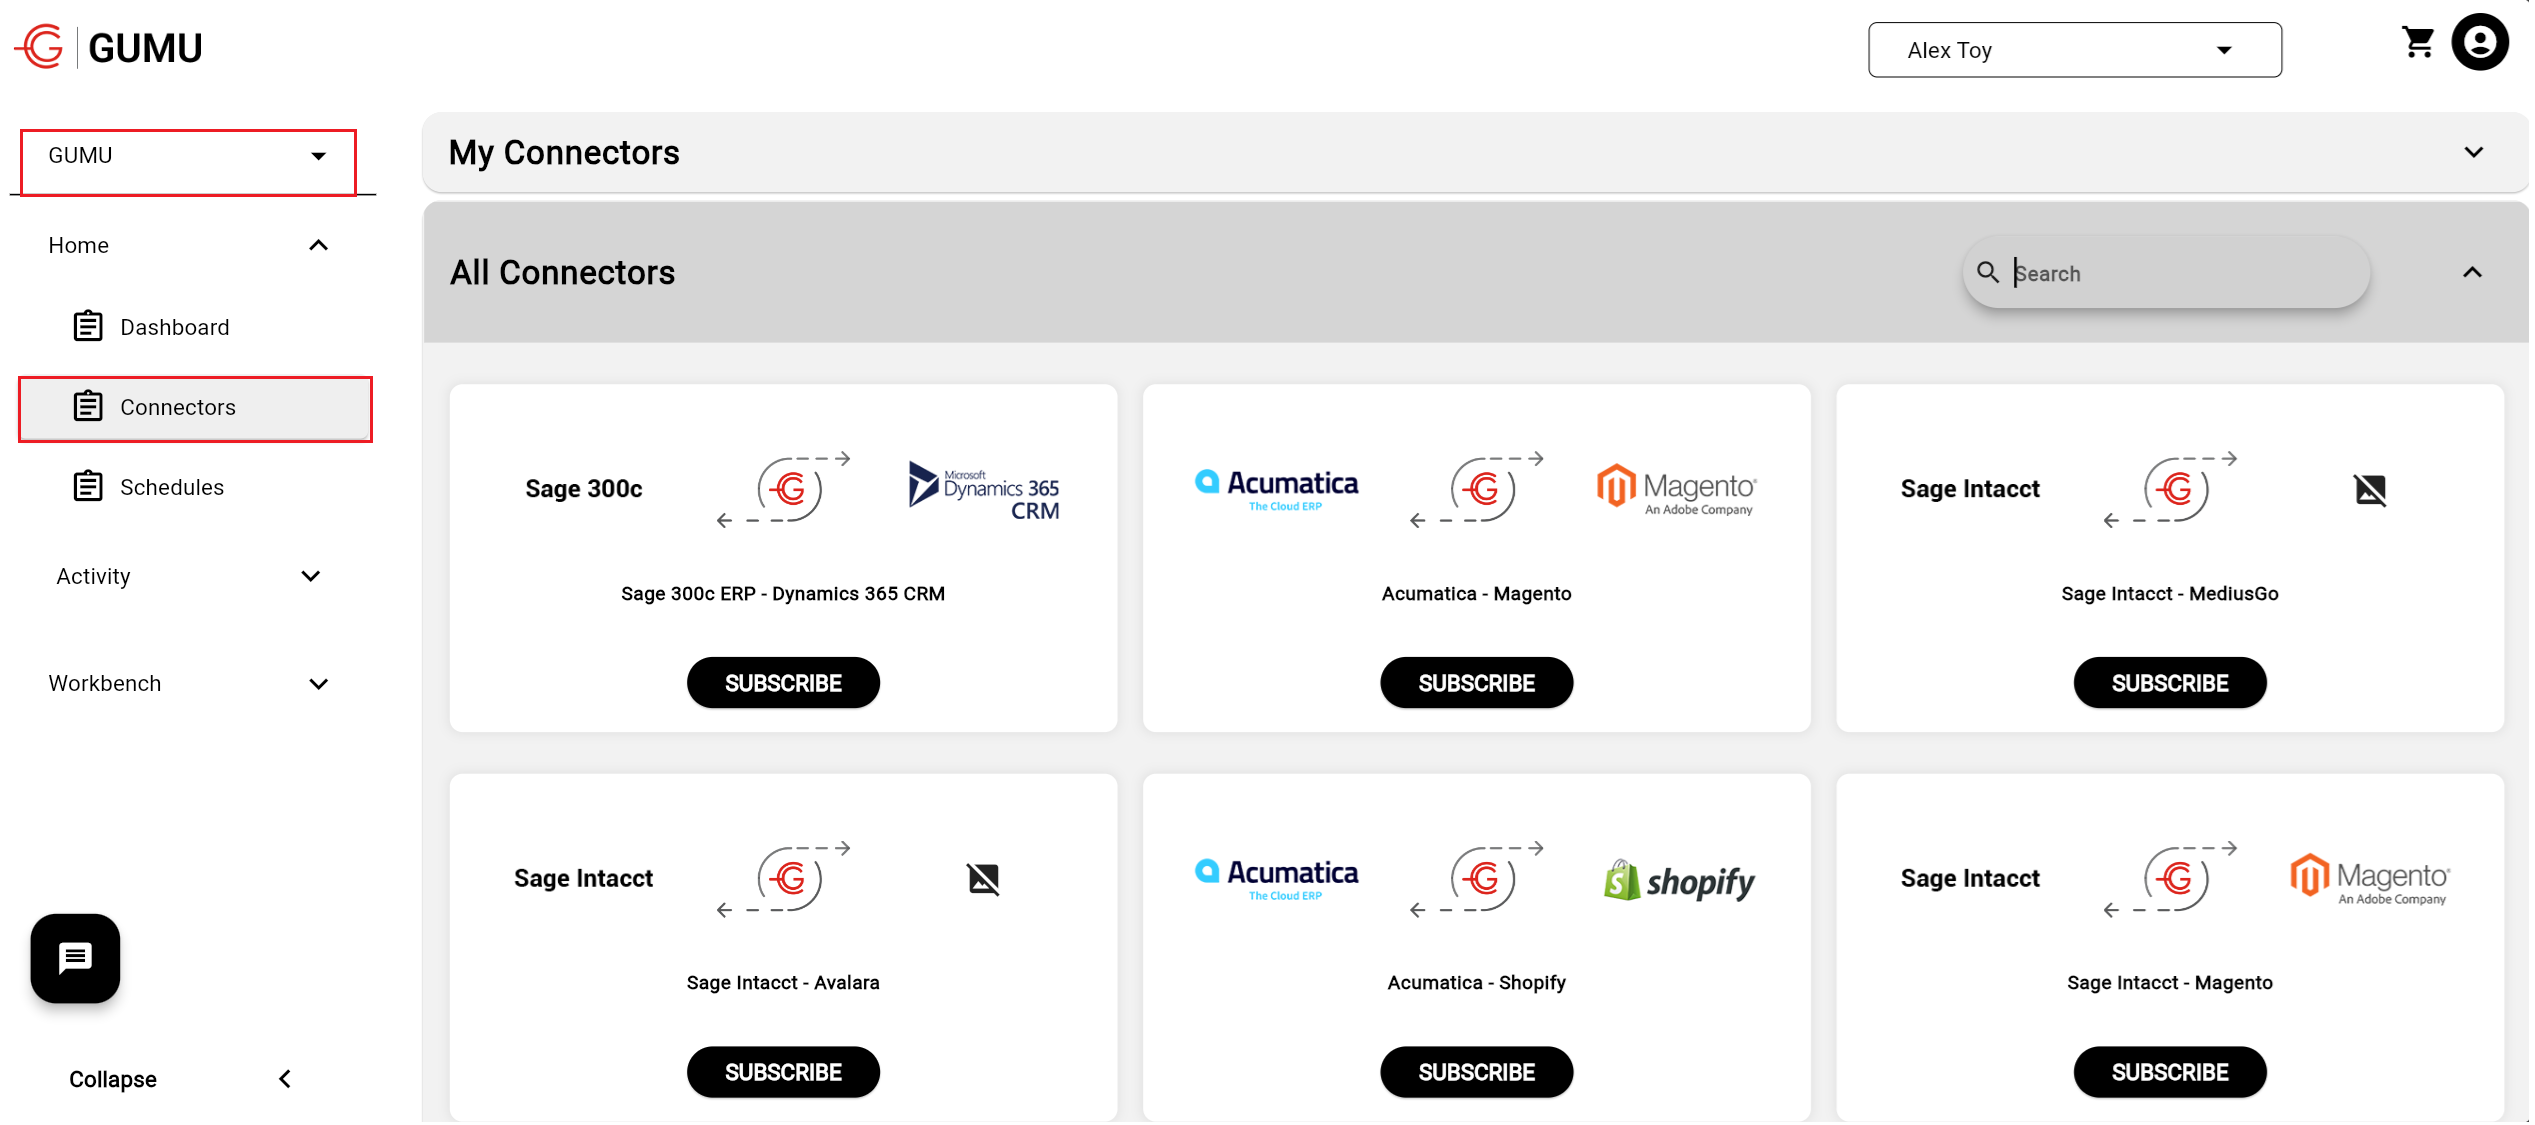
5. Next, in the top-left section, select the **GUMU** app -> **Home** -> Navigate to the **Connectors** section

<figure><img src="https://794987320-files.gitbook.io/~/files/v0/b/gitbook-x-prod.appspot.com/o/spaces%2F-MCRVg-TYx3gVa2Tqtf_%2Fuploads%2FM5mF6Ck5IZ06ZsNb6jEU%2Fimage.png?alt=media&amp;token=4cf5952d-dc34-48c2-ab18-9cf38e50b43e" alt=""><figcaption></figcaption></figure>

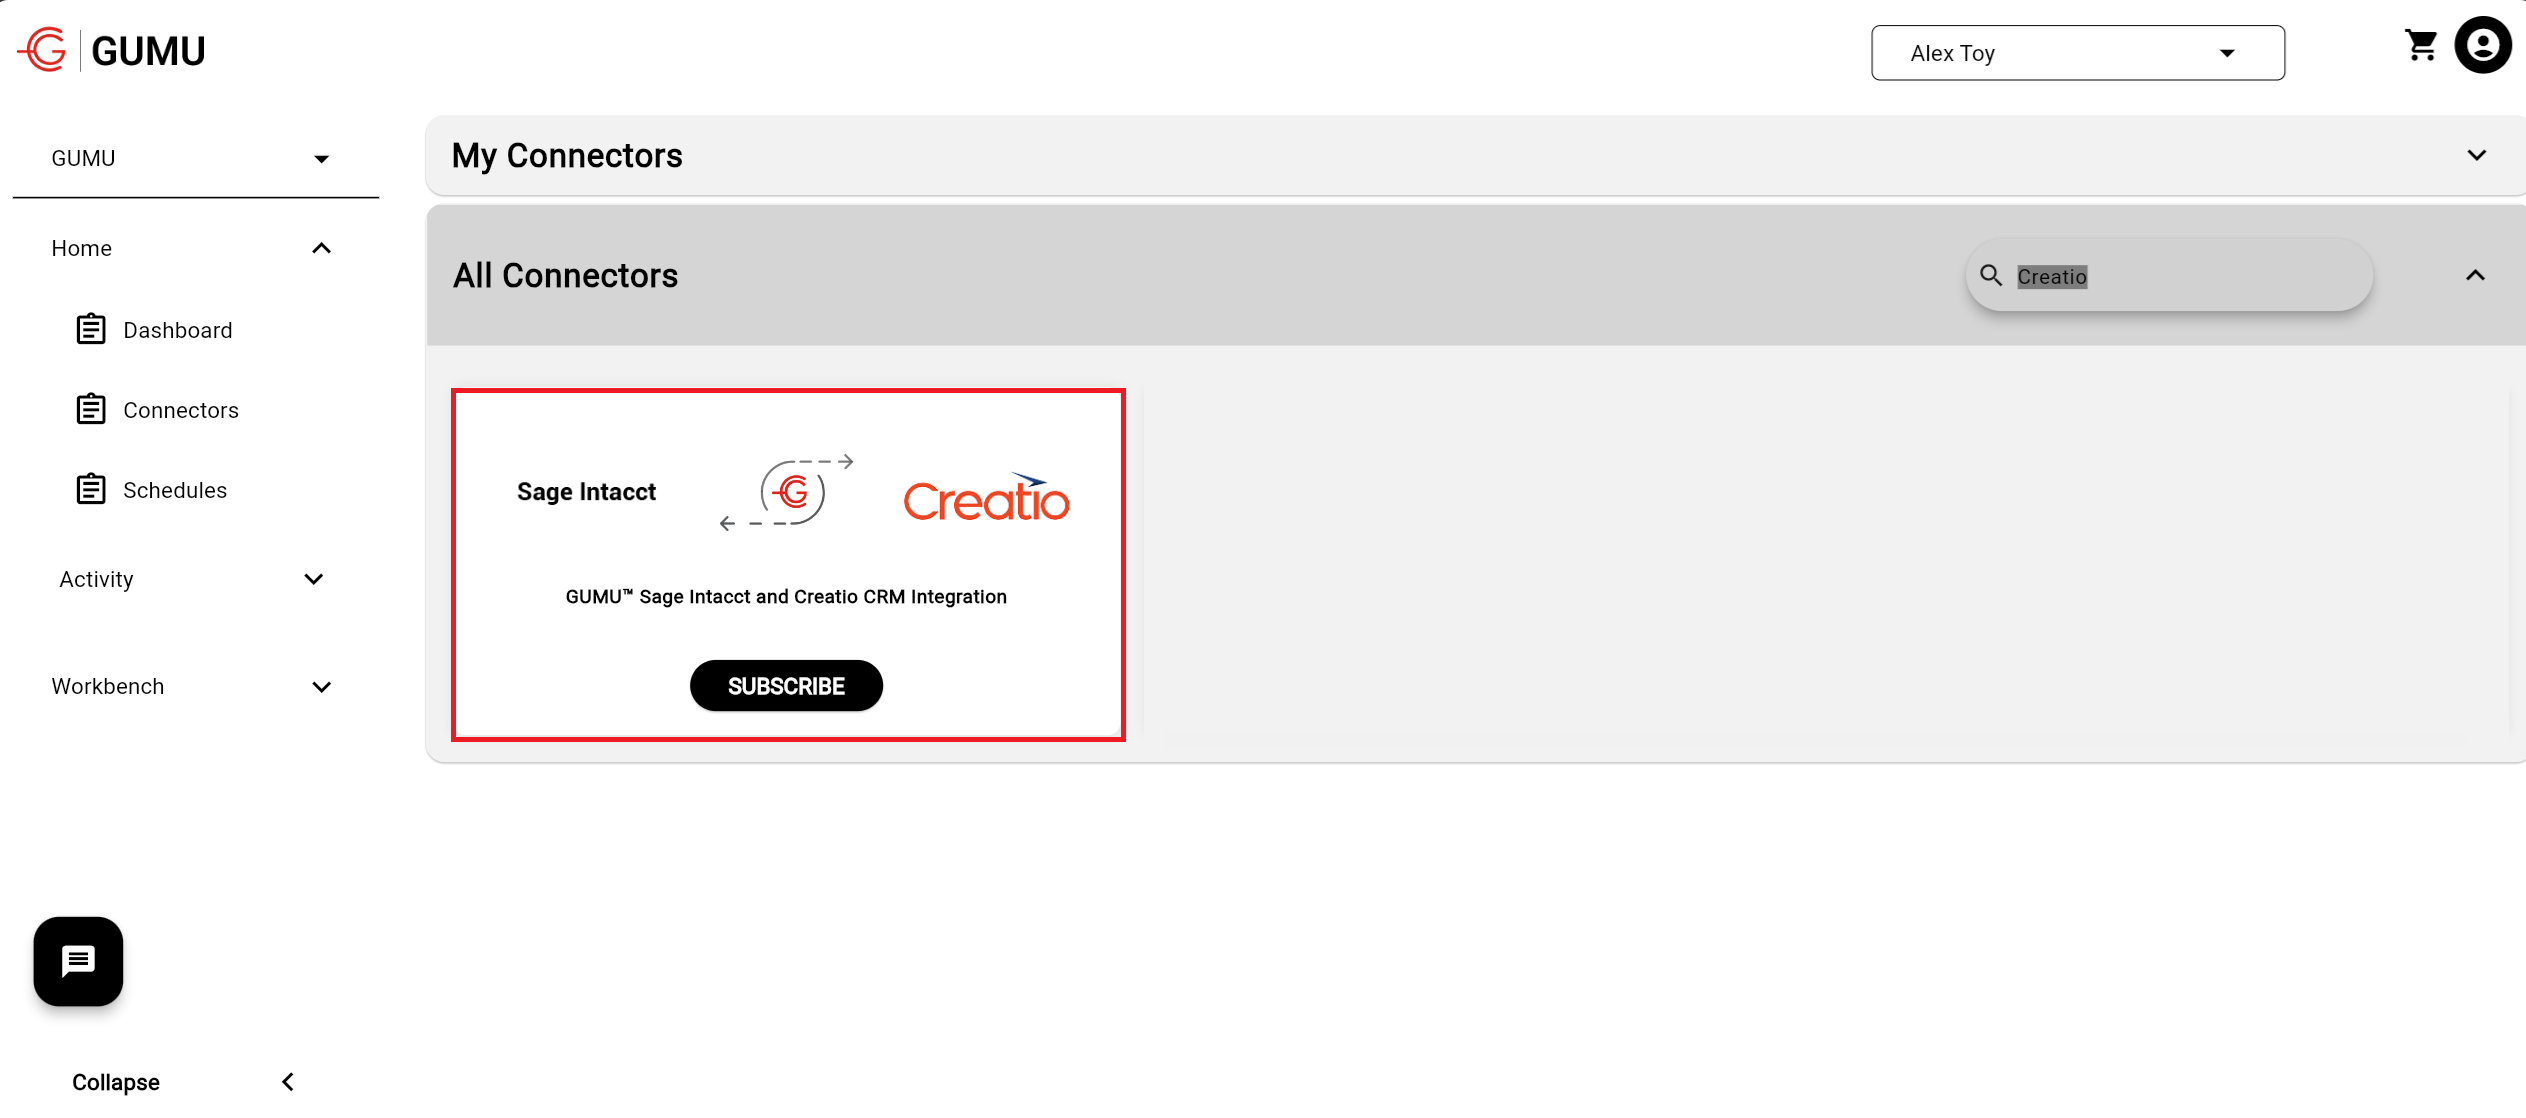
6. Search for the **Creatio** Integration product and subscribe to it.

<figure><img src="https://794987320-files.gitbook.io/~/files/v0/b/gitbook-x-prod.appspot.com/o/spaces%2F-MCRVg-TYx3gVa2Tqtf_%2Fuploads%2FKtNobHffShKSUr3CBCG9%2Fimage.png?alt=media&amp;token=a36d3245-d039-4235-98f9-b4031d8bf928" alt=""><figcaption></figcaption></figure>

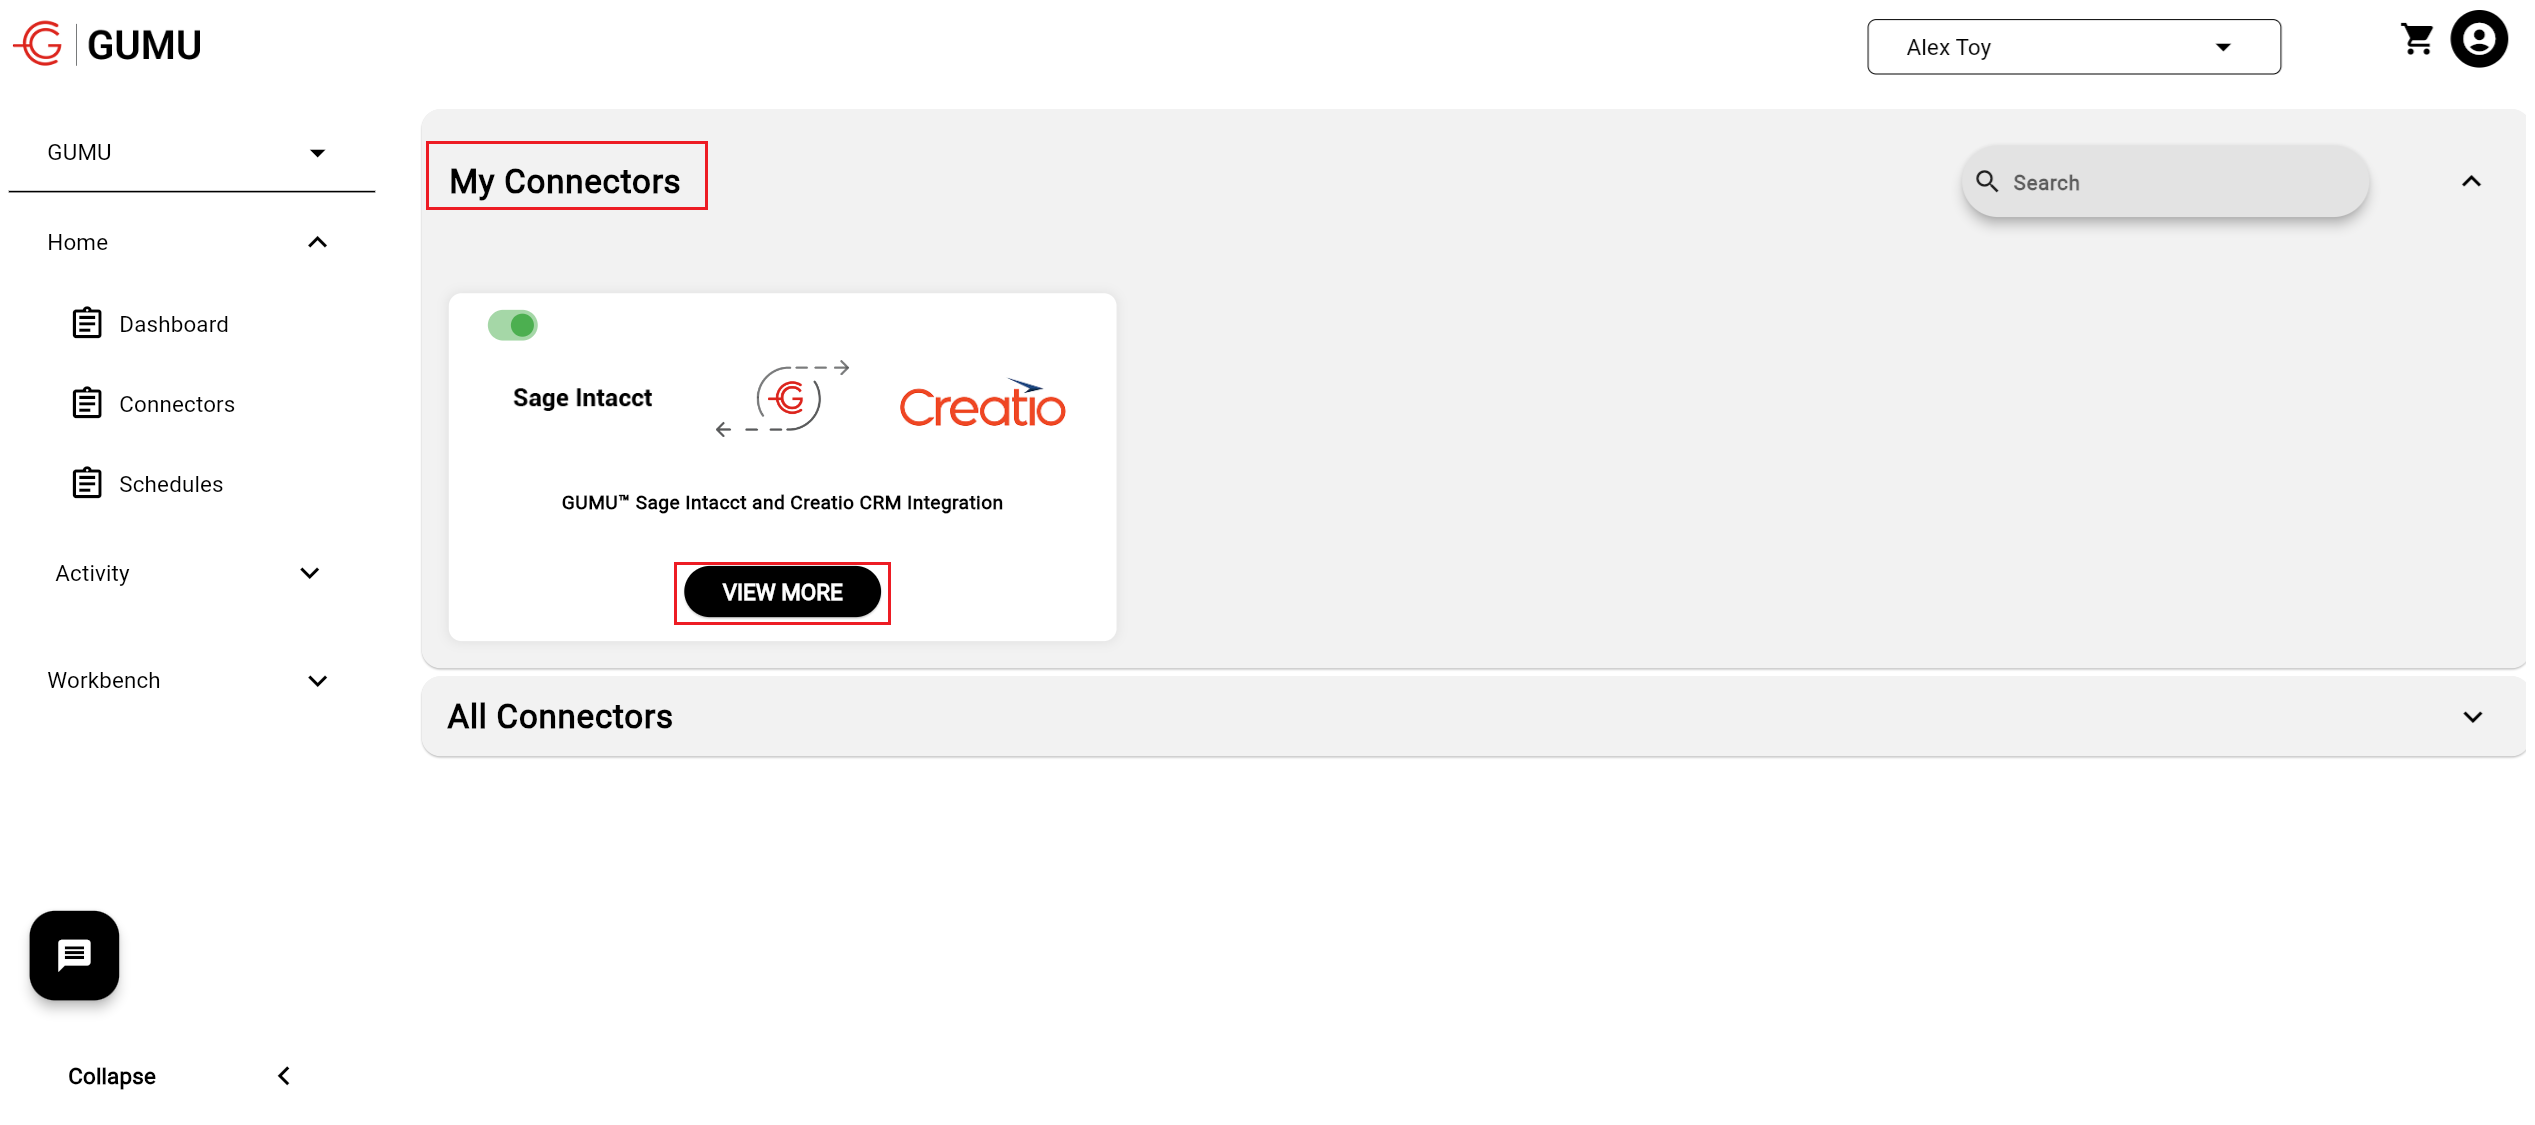
7. Once done, the user can see the “GUMU Sage Intacct and CRM Integration” connector in **My Connectors**. Click on **View more**.

<figure><img src="https://794987320-files.gitbook.io/~/files/v0/b/gitbook-x-prod.appspot.com/o/spaces%2F-MCRVg-TYx3gVa2Tqtf_%2Fuploads%2FRz4F8xzRaY7e309xfpQ4%2Fimage.png?alt=media&amp;token=c06941a9-6eb4-45f6-bcac-93d824429cc3" alt=""><figcaption></figcaption></figure>

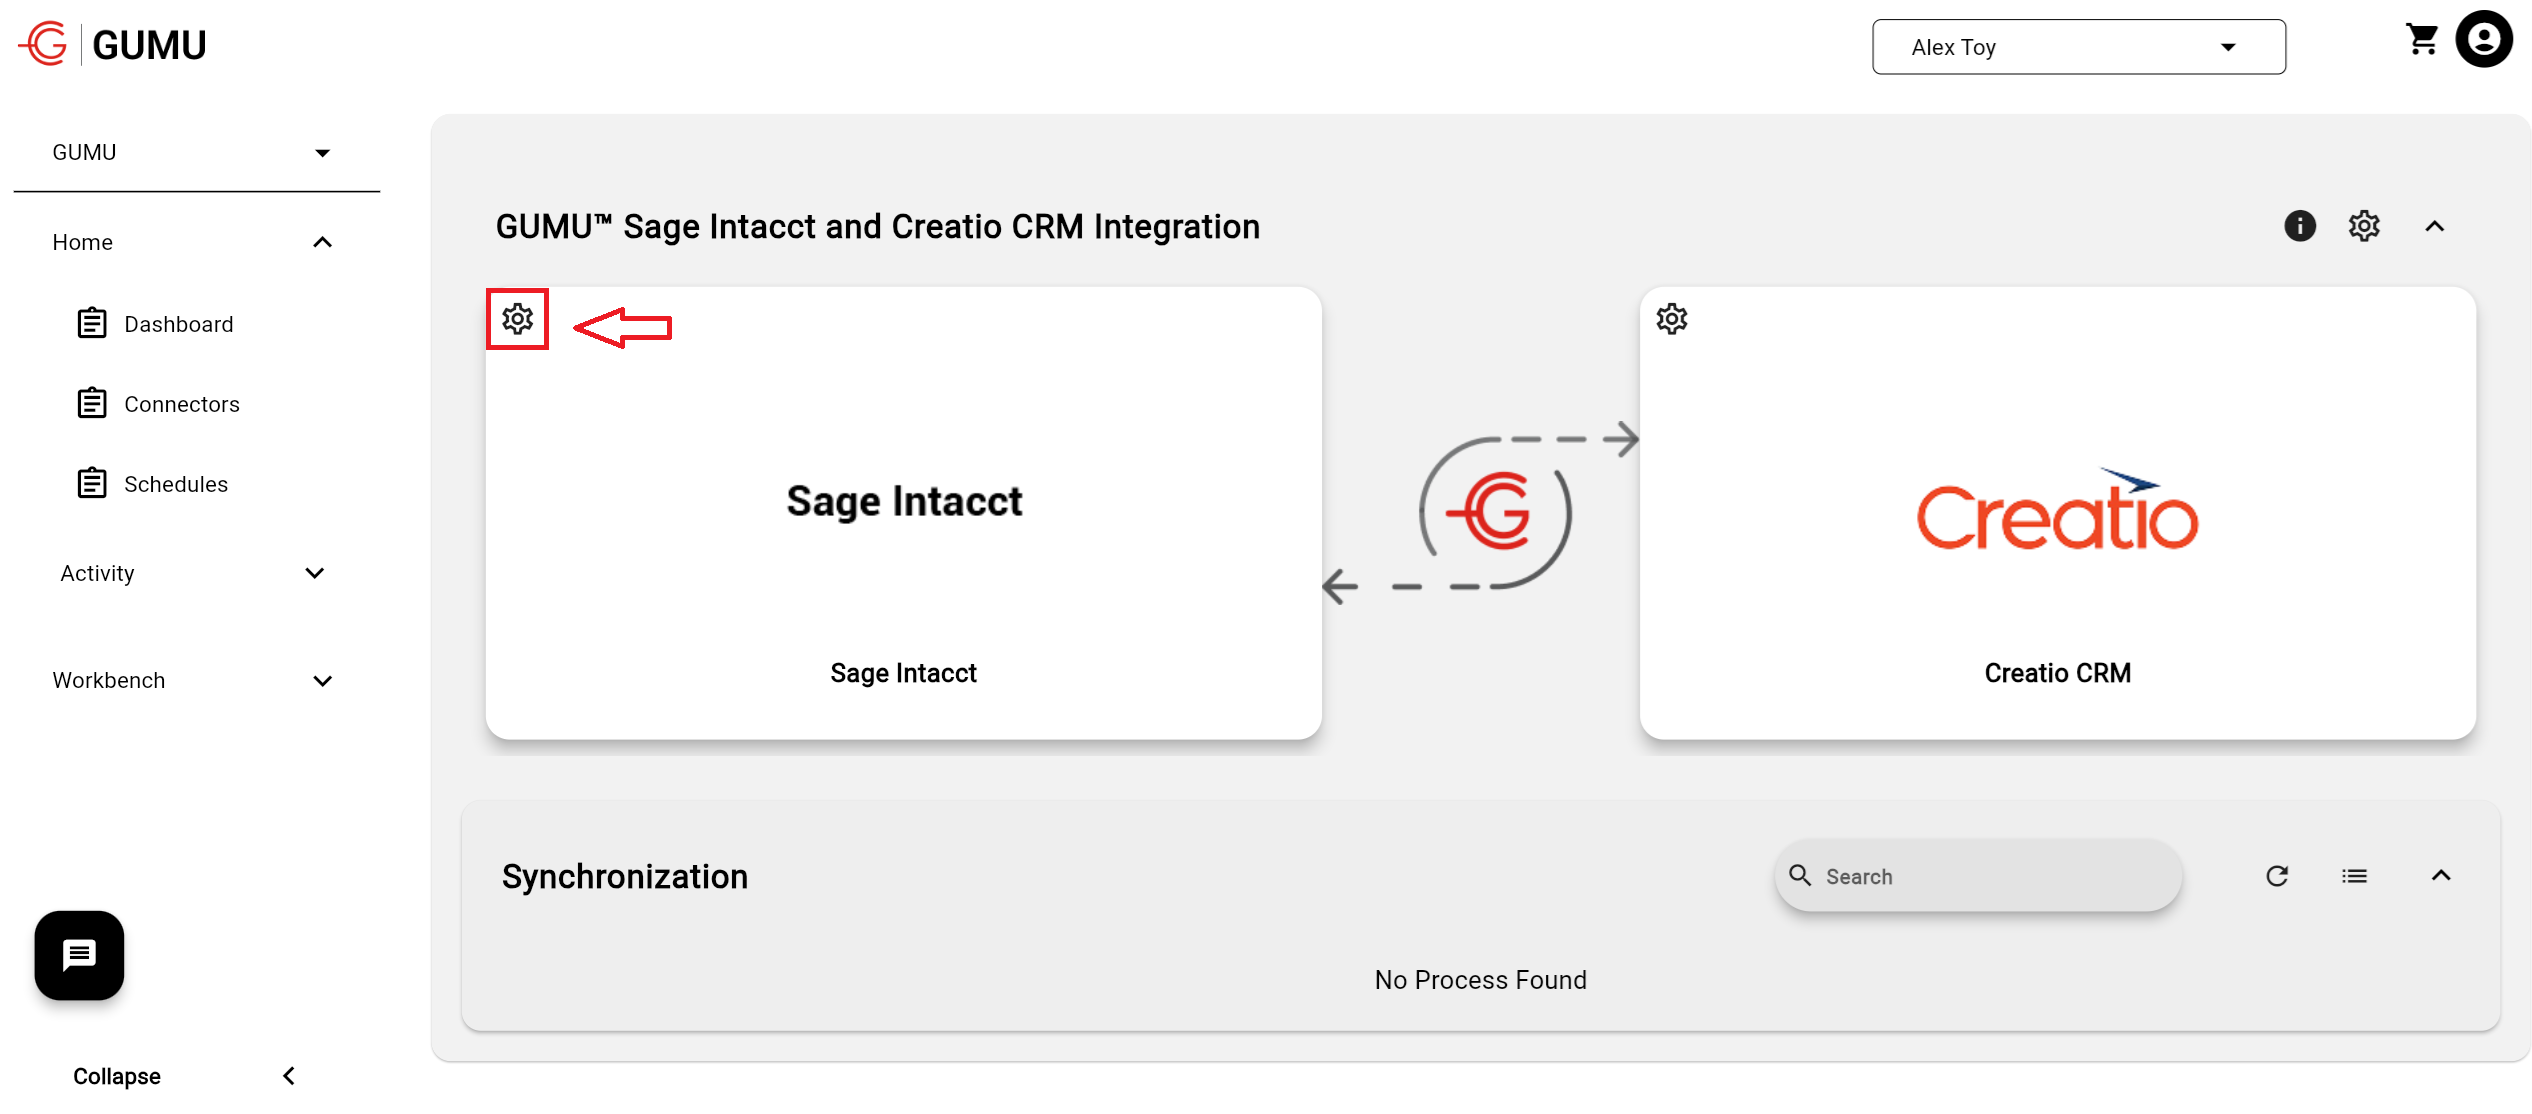
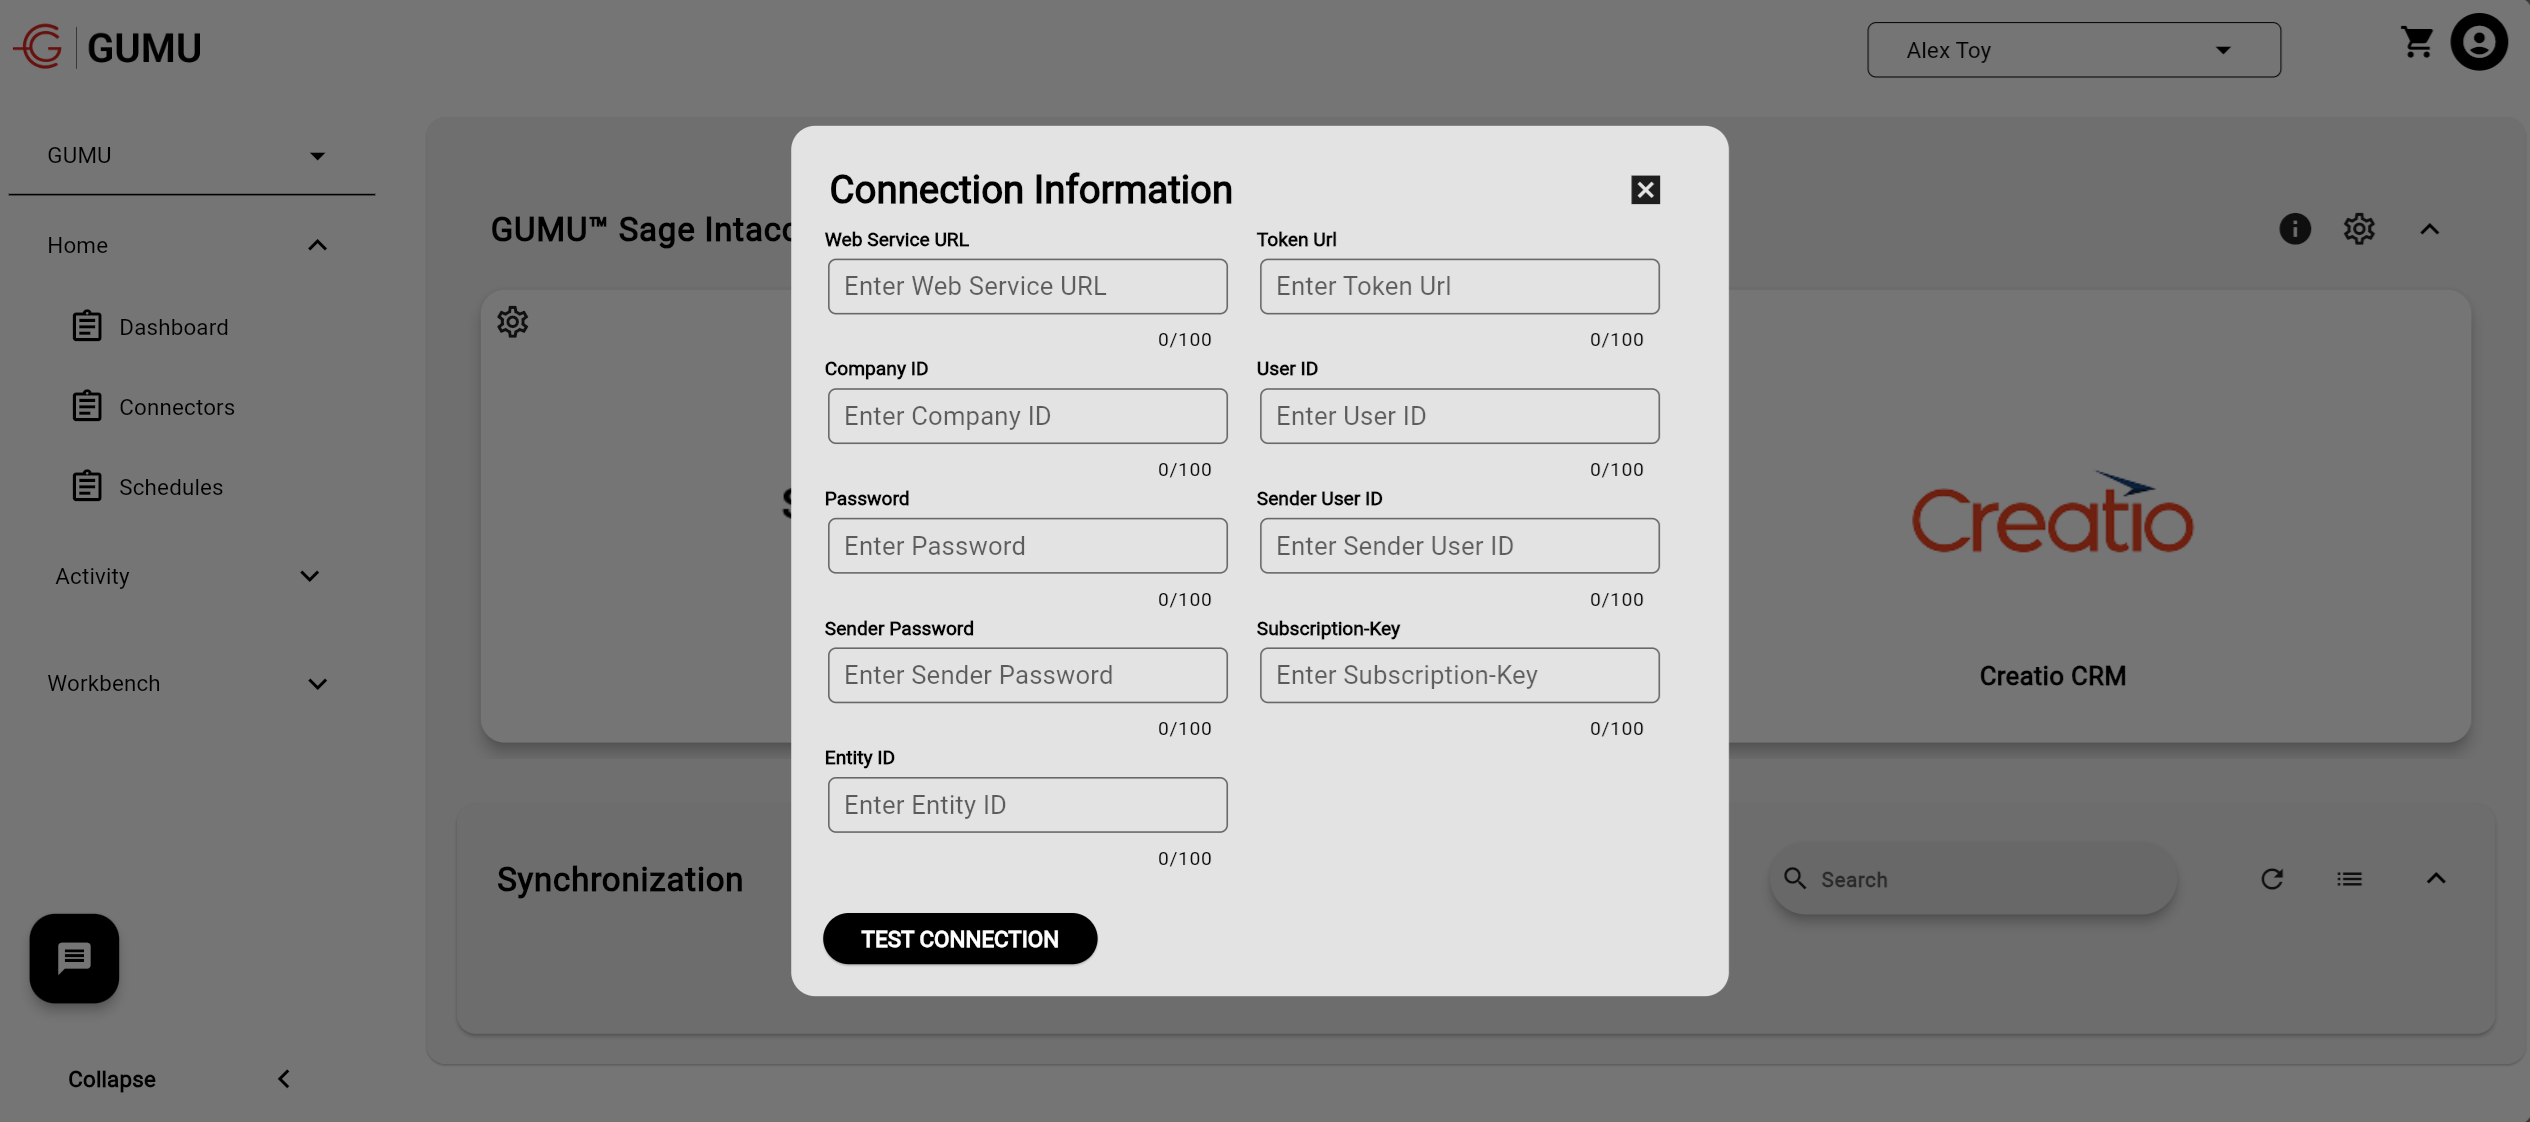
8. Click on the settings icon on **Sage Intacct**,

<figure><img src="https://794987320-files.gitbook.io/~/files/v0/b/gitbook-x-prod.appspot.com/o/spaces%2F-MCRVg-TYx3gVa2Tqtf_%2Fuploads%2Fby2I2BUhAeBPxn3YAxJw%2Fimage.png?alt=media&amp;token=f35fefb4-a623-4fa3-bfdc-8475f319187b" alt=""><figcaption></figcaption></figure>

Enter the valid connection information specified below and click on **Test connection**.

<figure><img src="https://794987320-files.gitbook.io/~/files/v0/b/gitbook-x-prod.appspot.com/o/spaces%2F-MCRVg-TYx3gVa2Tqtf_%2Fuploads%2Fksx5Pqu9QONM0x82GJMv%2Fimage.png?alt=media&amp;token=e3d2e7fa-1094-44ed-ad30-71f51cb40371" alt=""><figcaption></figcaption></figure>

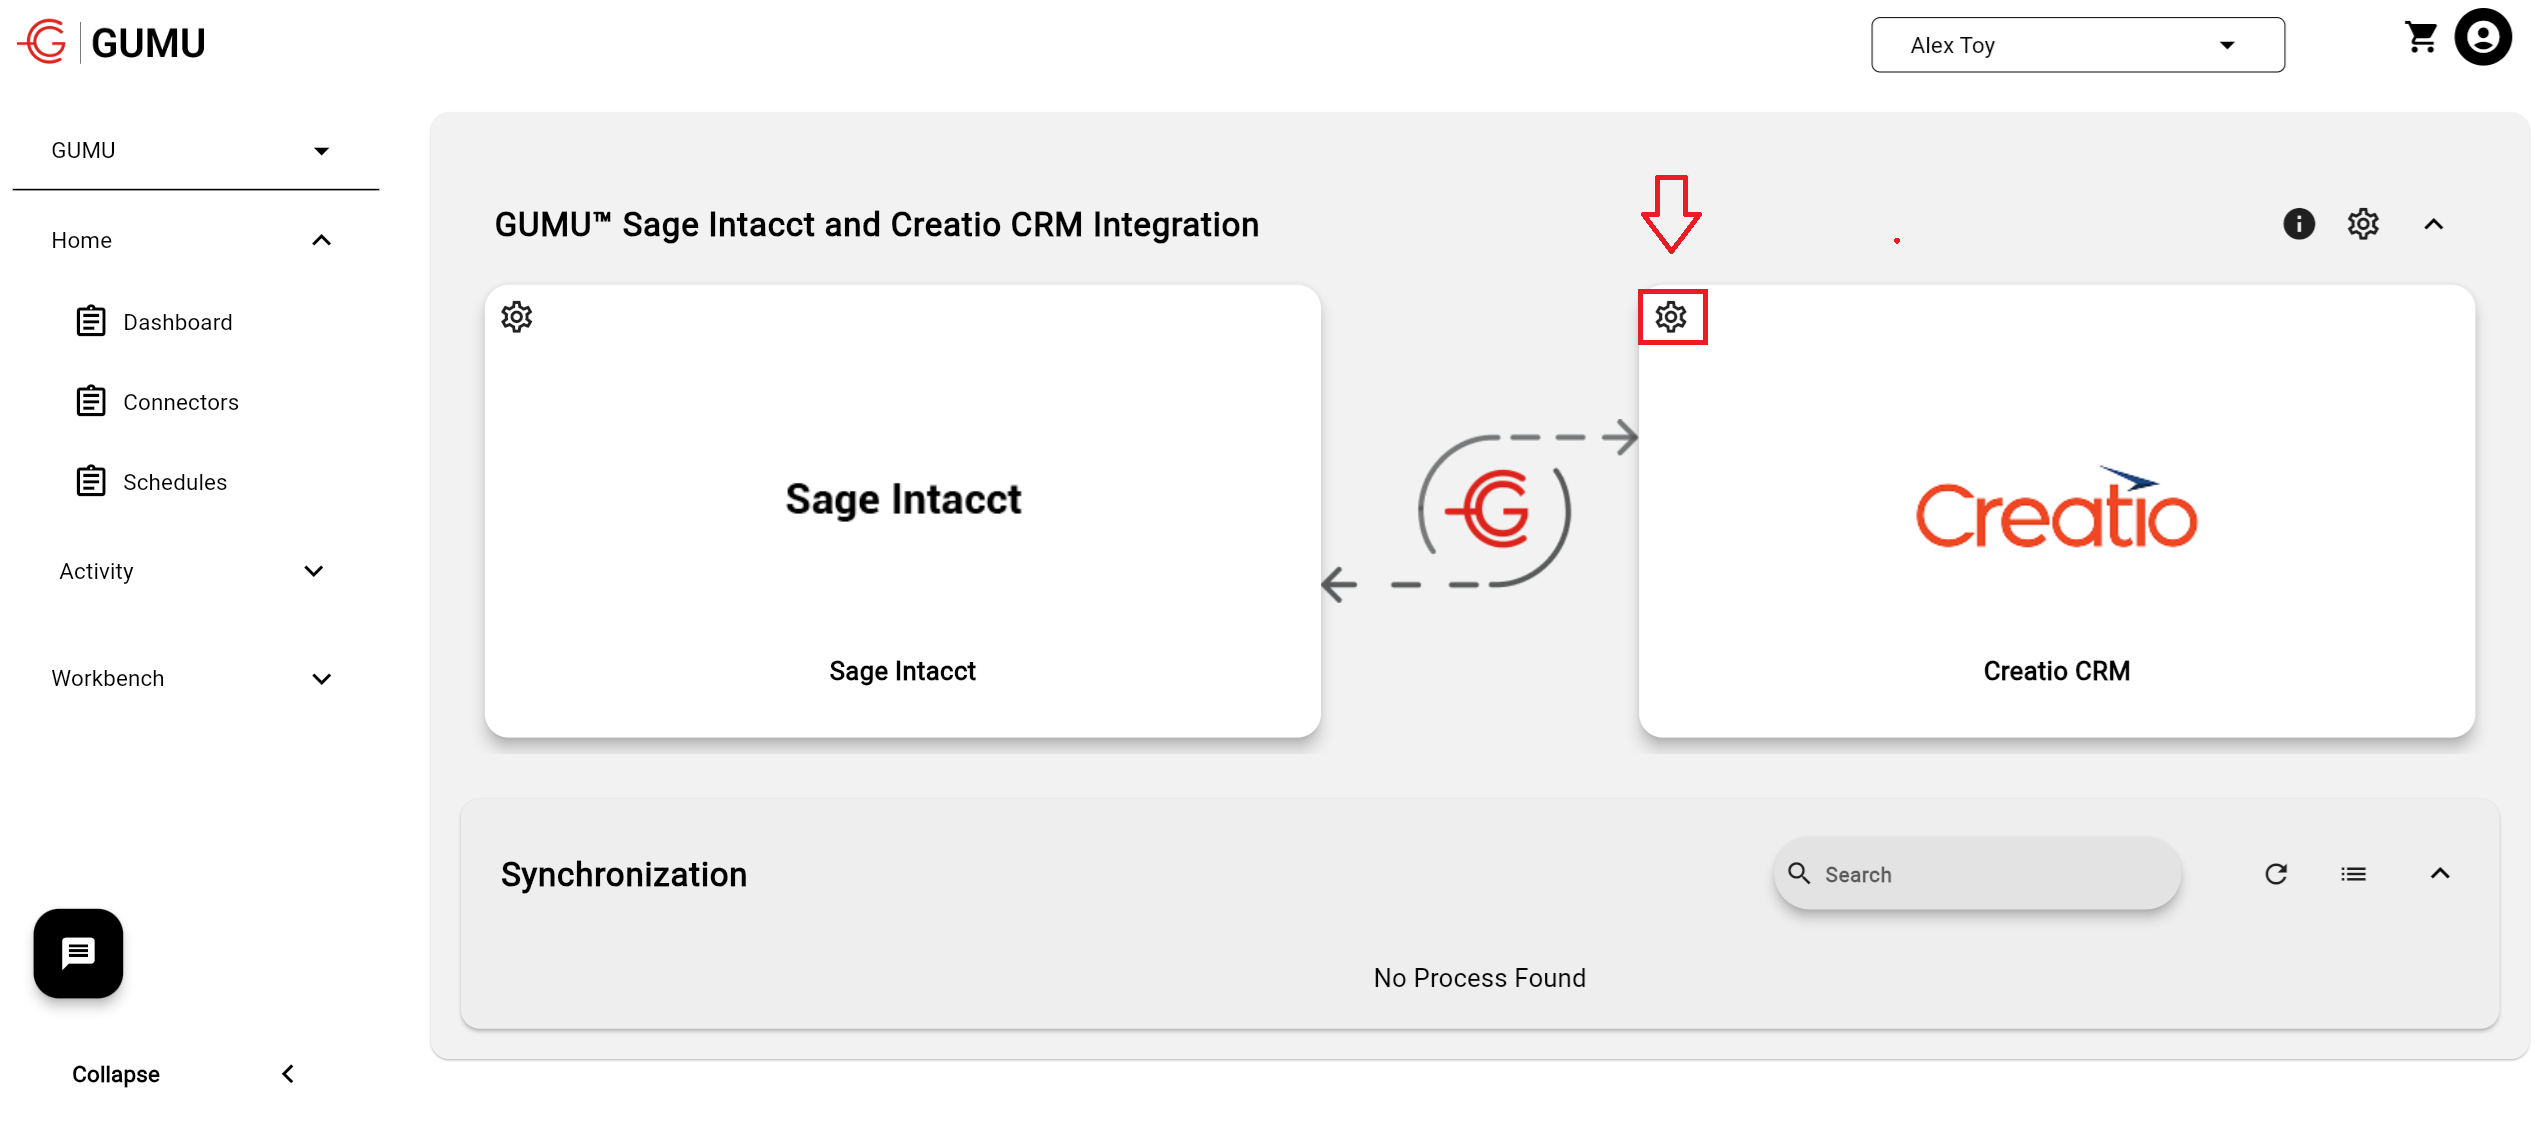
9. Click on the settings icon on **Creatio CRM**,

<figure><img src="https://794987320-files.gitbook.io/~/files/v0/b/gitbook-x-prod.appspot.com/o/spaces%2F-MCRVg-TYx3gVa2Tqtf_%2Fuploads%2FC9GMO5p9CCYvbFwvDgcU%2Fimage.png?alt=media&amp;token=7b56ee17-a444-490d-b262-e7c319fdf6bb" alt=""><figcaption></figcaption></figure>

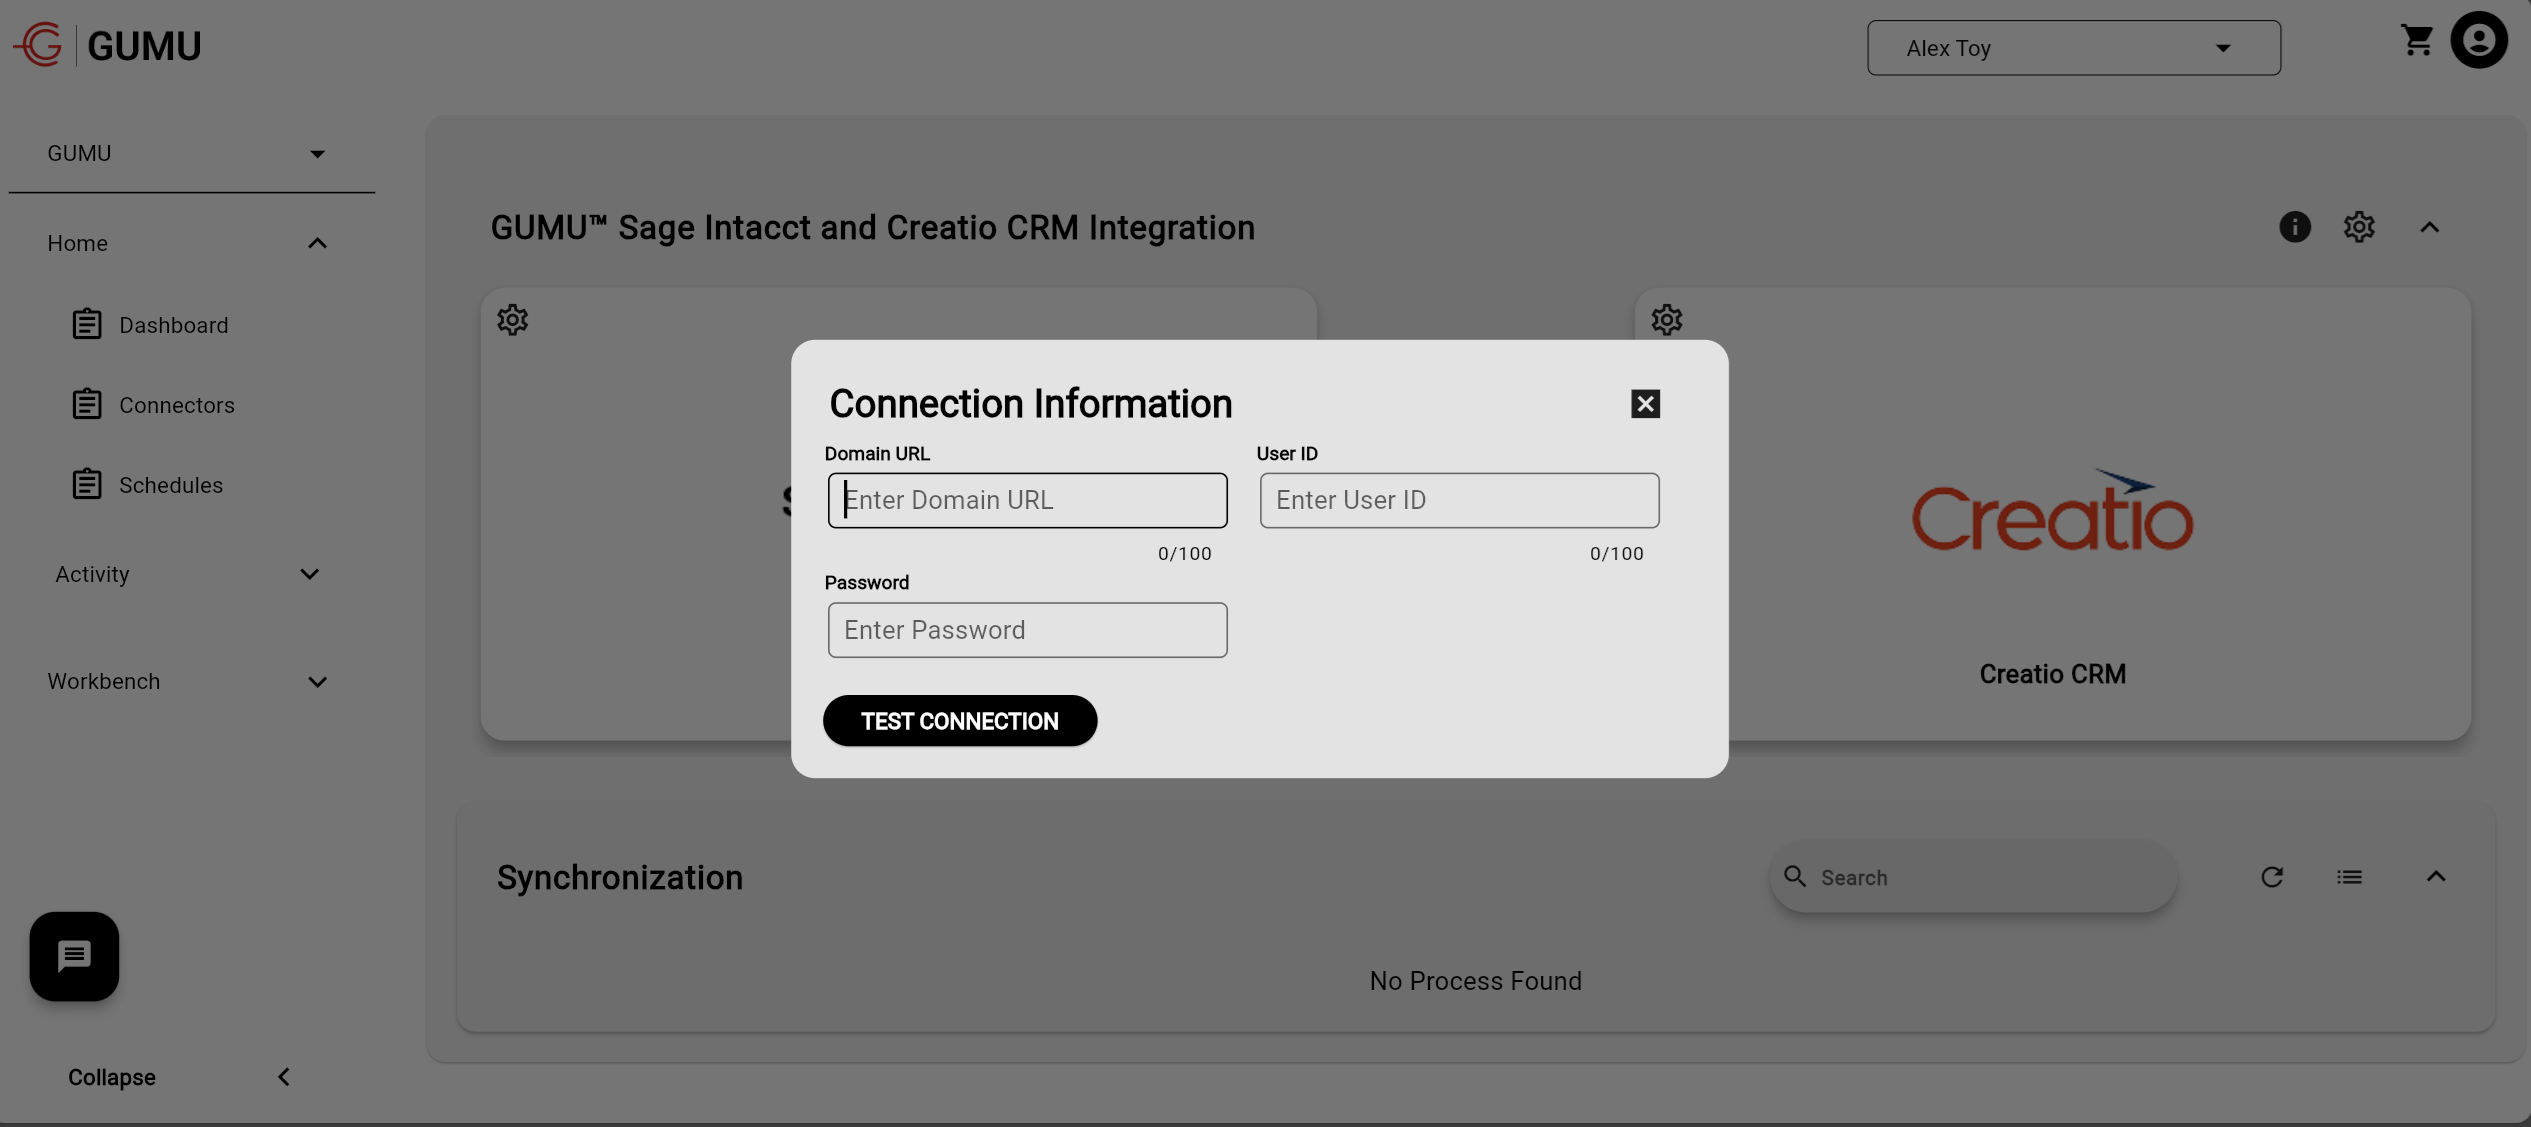
Enter the connection information specified below and click on **Test connection**.

**Domain URL**: Enter your Creatio URL

**User ID**: Enter your Creatio admin-level user account name

**Password**: Enter your password for the above Creatio user

<figure><img src="https://794987320-files.gitbook.io/~/files/v0/b/gitbook-x-prod.appspot.com/o/spaces%2F-MCRVg-TYx3gVa2Tqtf_%2Fuploads%2FgVzZsuYtwke0ULAMDgOr%2Fimage.png?alt=media&amp;token=a0a9219a-0c91-4ac0-9bc3-db6425c44a37" alt=""><figcaption></figcaption></figure>

10. Once the Test connection is successful, please share the details below at <Creatio@greytrix.com> so we can enable the account at our end.

* Your Creatio URL with which you want to integrate
* BPortaly Username
* BPortaly user’s Organization Name