> For the complete documentation index, see [llms.txt](https://docs.greytrix.com/llms.txt). Markdown versions of documentation pages are available by appending `.md` to page URLs; this page is available as [Markdown](https://docs.greytrix.com/gumu-sage-crm-integration/sage-x3/installation-guide/charts-and-dashboard-setup..md).
# Charts and Dashboard Setup.
**Node.js Installation on CRM Server**\
\
With our GUMU™ Integration, we have introduced chart and dashboard screens in CRM applications. With the help of these screens, the user now has the ability to view data for quick and high-level visual sales analysis. On this screen, we display the customer’s data on global and individual levels from Sage X3 on a real-time basis.
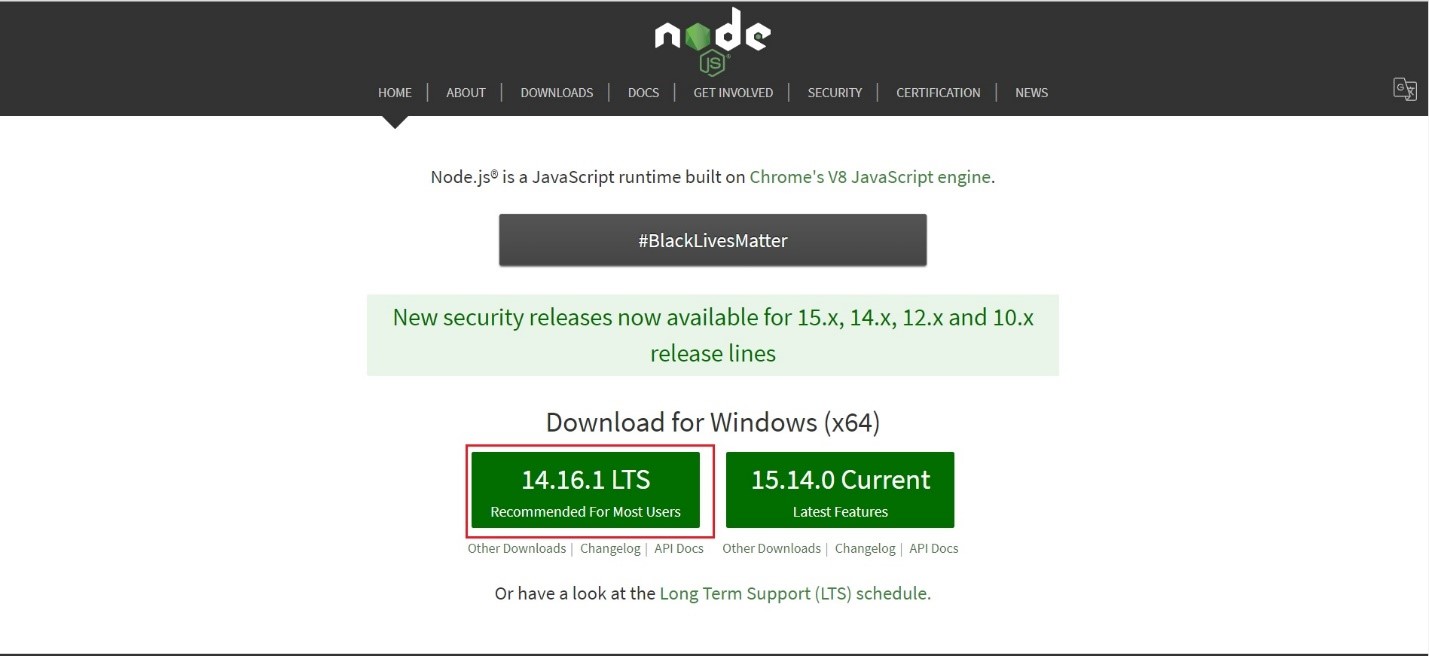
1. For GUMU™ Charts and dashboard screens to work, we need to download and Install the node.js LTS version setup file from given URL -
2\. Users can also check the installed node.js setup version by following the below steps
\- Open the Start menu, then type cmd in the Search box and press Enter\
\- Run the command prompt using run as administrator\
\- In the command line window that appears, type node --version and press Enter\
\- On the below line node.js version will appear
**Node-Red setup and installation**
3\. For charts and dashboard details to appear on the CRM screens the user will need to install node-red using the command prompt. Open the command prompt with run as administrator and type the below command
npm install -g --unsafe-perm node-red
4\. After node-red installation, run the node-red below command under the administrator run command prompt to keep the Kendo charts up and running
node-red
5\. Access the Node-Red URL below\
URL:- http\://\[system IP address]:1880/\
E.g. -
6\. The user will need to check if the MSSQL-plus module is installed under Node-Red. If not, then it needs to install, and for that follow below Screenshots and steps.
* Click on Menu present on the right side corner and select the Manage Palette as shown below
* Now navigate to the Install tab, search for the MSSQL module in the search module and install the MSSQL-plus module. Refer below screenshot for a better understanding
7\. Once the MSSQL-plus module is installed. The user needs to import the SQL node.json file under Node-Red by performing the steps below
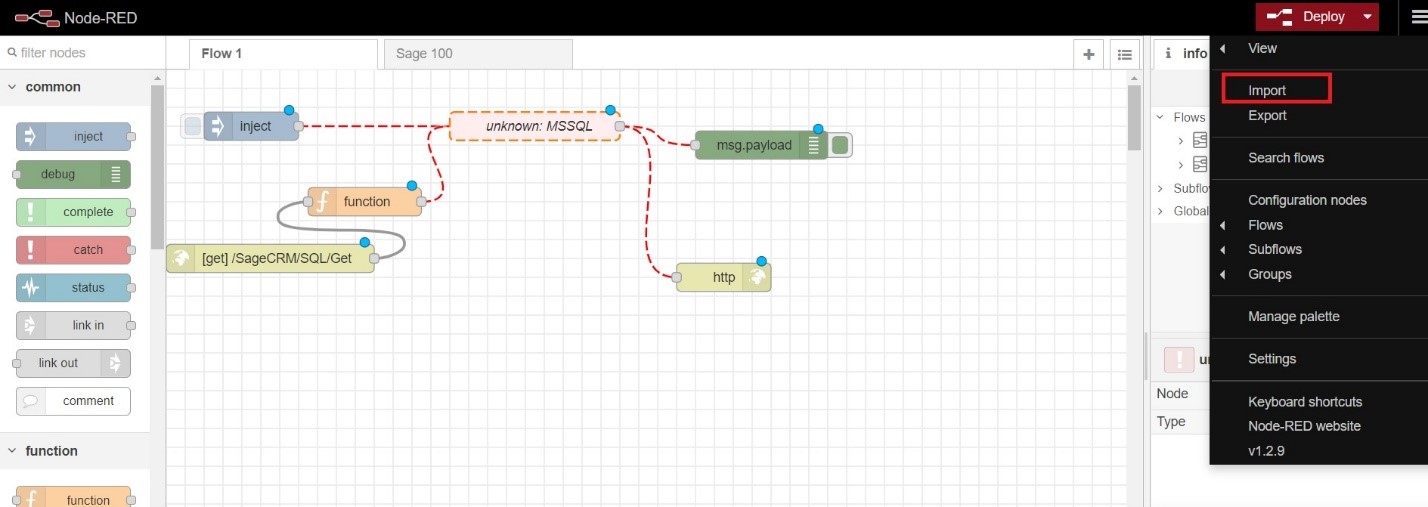
* Click on the menu button present on the node-red application and then click on the Import button.
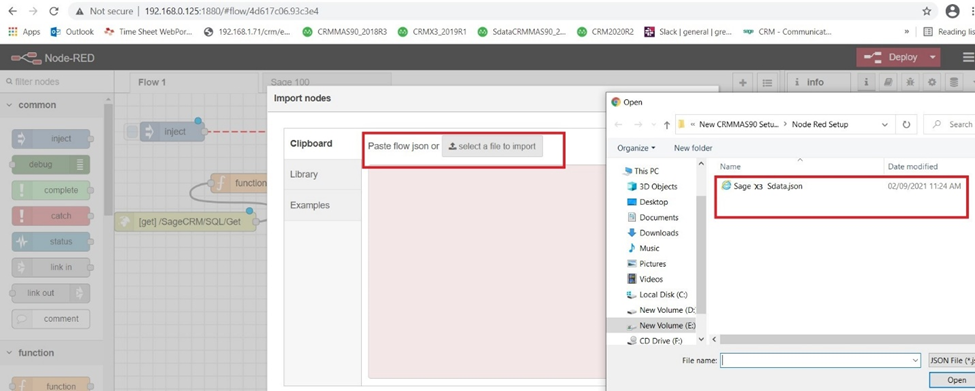
* Click on select a file to import then navigate to the given path below and select Sage X3 SQL.json file (Assuming the Greytrix folder is on C drive)\
*C:\Program Files (x86)\Greytrix\GUMU for Sage CRM - Sage X3\Patches\V7 OR Above\Sage X3 SQL.json*
* Click on the import button to import the selected JSON file
8\. After the JSON file gets imported then click on the Deploy button present in the right corner
9\. Now, double-click on MSSQL-PLUS where the properties screen will get displayed to add CRM’s SQL details click on the edit as shown below
10\. Add the proper CRM SQL details similarly as shown below image and also check the same checkbox as shown below
11\. Once the SQL details are configured under the properties screen. The user can do a test connection which can be verified through logs when clicking on the debug button. Refer to the below image.
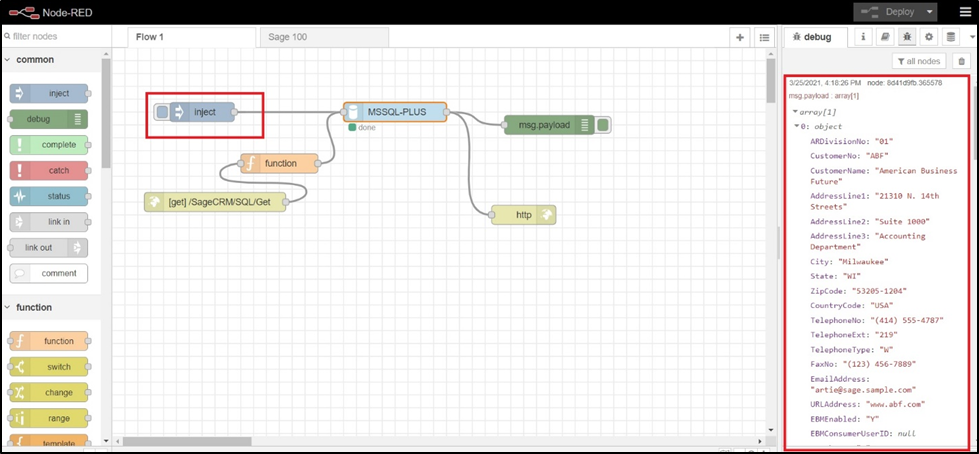
12\. After that click on inject button, and the logs will get generated under debug screen as shown below
13\. Expand the logs at the detail level and verify if data arrive similar to that present in Sage X3.
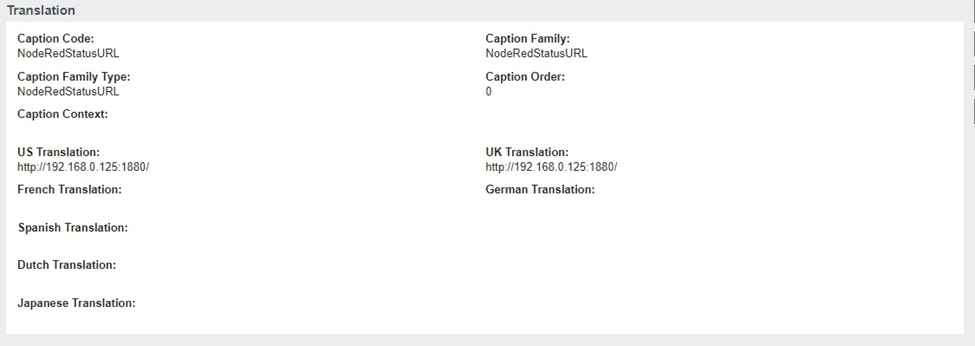
14\. The Node-Red URL needs to configure in CRM. For that Navigate to Administration > Translation and enter the below-mentioned details under respective fields and search\
\
Caption Family: NodeRedStatusURL\
Caption Code : NodeRedStatusURL
Now click on the caption code hyperlink and enter the details of the node-red URL
E.g.:- node url - http\:// \[node red IP]:1880/
Also, similarly as shown below Image and save the details
15\. The Dashboard that has the ability to show the customer’s data need to be created manually.
**ERP Data Dashboard**
* Go to the Sage CRM home page there click on new dashboard button and select Create Dashboard.
* Under Dashboard, details enter name as ‘ERP Data’ and click ok then cancel.
* Now click on the new gadget button beside the new dashboard button and then click on create gadget and select web site.
* On the gadget wizard screen, under the content block field select ERPGolbalDashboard and click on the next button
* Enter ‘Sage X3 Data’ under the name field and click on the finish button.
**Customer Dashboard**
* Similarly, create a dashboard for customers. Select one of the customers and go to the dashboard. Now click on the new dashboard button and select Create Dashboard.
* Under Dashboard, details enter the name as ‘Customer Dashboard’ and click ok then cancel.
* Now click on the new gadget button beside the new dashboard button and click on create gadget and select web site.
* On the gadget wizard screen, under the content block field select ERP Dashboard and click on the next button
* Enter ‘Sage X3 Data’ under the name field and click on the finish button.
For Configuring GUMU™ from Sage CRM and Sage X3 side, kindly refer User Guide.